 By
By 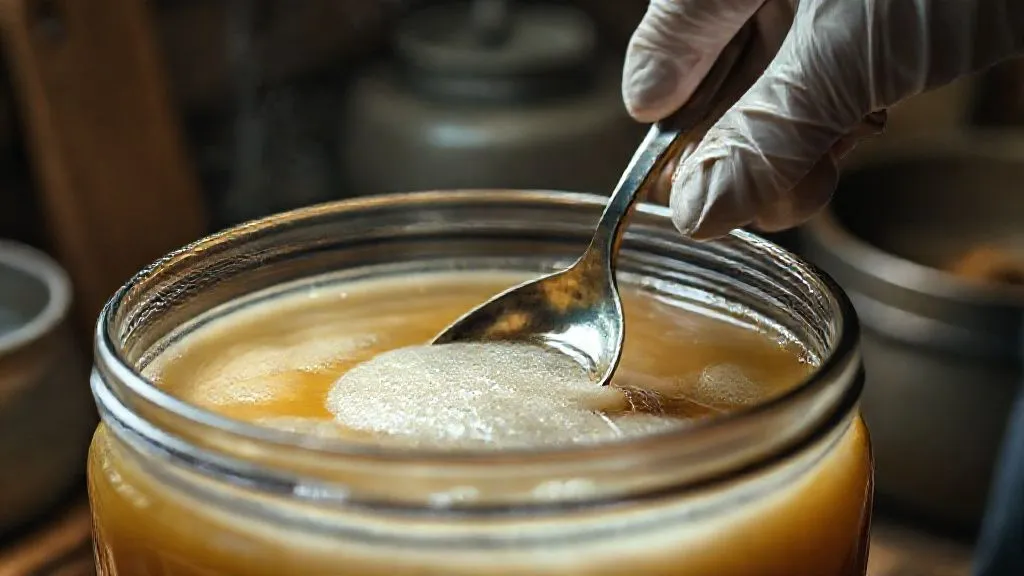
How to salvage a wild fermentation batch with kahm yeast contamination?
For over two decades in the vibrant world of wild fermentation, I've witnessed countless aspiring fermenters face a common, disheartening sight: a mysterious white film blooming atop their precious kraut, kimchi, or pickles. That moment of dread, wondering if all your hard work is destined for the compost bin, is incredibly relatable. I've been there myself, learning through trial and error, and guiding others through similar predicaments.
This unwelcome visitor, often mistaken for dangerous mold, is typically kahm yeast – a naturally occurring, generally harmless yeast that can thrive in anaerobic environments. While it's not inherently dangerous, its presence can impact the flavor and texture of your ferment, and if left unchecked, it can create conditions where less desirable microbes might take hold. It's a sign that something in your fermentation environment isn't quite optimal.
But here's the good news: a kahm yeast contamination doesn't automatically spell disaster. In this comprehensive guide, I'll share my expert, hands-on strategies, honed over years of experience, to not only identify kahm yeast correctly but, more importantly, to successfully salvage your wild fermentation batch. You'll learn actionable steps, crucial preventative measures, and gain the confidence to troubleshoot like a seasoned pro, ensuring your ferments are safe, delicious, and vibrant.
Understanding Kahm Yeast: Friend or Foe?
Before we dive into salvage operations, it's vital to truly understand what kahm yeast is. Often referred to as 'pellicle-forming yeasts,' these are a diverse group of aerobic yeasts, meaning they thrive in the presence of oxygen. They form a film or pellicle on the surface of liquids, particularly in low-pH, nutrient-rich environments like your fermenting brine. Common culprits include species from genera like Pichia, Candida, and Hansenula.
In the grand scheme of fermentation, kahm yeast is typically considered a nuisance rather than a direct threat to health. It's not pathogenic, meaning it won't make you sick in the way some molds or bacteria can. However, its presence indicates an imbalance in your ferment. It can consume valuable lactic acid, reducing the acidity that protects your food from spoilage, and it can introduce off-flavors – often described as yeasty, musty, or even solvent-like – and a soft, undesirable texture to your vegetables.
In my experience, kahm yeast is fermentation's gentle nudge, telling you to pay closer attention to your process. It's not a death sentence for your batch, but a call to action to refine your technique and create a more robust, anaerobic environment for your desired lactic acid bacteria to flourish.
Understanding this distinction is the first step toward effective troubleshooting. It empowers you to approach the problem with knowledge, rather than fear, and increases your chances of a successful salvage.

Identifying Kahm Yeast vs. Malicious Mold
This is arguably the most critical step in deciding whether your batch is salvageable or destined for the bin. Misidentifying kahm yeast as mold, or vice-versa, can lead to unnecessary waste or, far worse, consuming unsafe food. The distinction often comes down to visual cues, but smell and even touch can play a role.
Visual Cues: Texture, Color, Growth Pattern
When examining your ferment, pay close attention to the characteristics of the surface growth:
- Kahm Yeast:
- Color: Typically white, cream, or off-white. It can sometimes have a slightly iridescent or translucent quality.
- Texture: Smooth, thin, film-like, leathery, or slightly wrinkled. It often appears as a continuous pellicle across the surface of the brine. It's rarely fuzzy or hairy.
- Growth Pattern: Usually starts as small, isolated patches that spread to cover the entire surface. It adheres closely to the liquid.
- Submergence: It might sink slightly into the brine or cling to the sides of the jar, but remains a film.
- Malicious Mold:
- Color: Often green, blue, black, pink, or even dark grey. White mold can exist, but it's usually accompanied by other tell-tale signs.
- Texture: Fuzzy, hairy, powdery, or cotton-like. It has a distinctly three-dimensional, raised appearance.
- Growth Pattern: Tends to grow in distinct, often circular, fuzzy patches. It can spread quickly and aggressively.
- Submergence: Mold typically grows *on* the surface of the food or liquid, often with visible aerial hyphae (the fuzzy bits) extending upwards.
| Feature | Kahm Yeast | Malicious Mold |
|---|---|---|
| Color | White, cream, off-white, sometimes translucent | Green, blue, black, pink, grey (rarely fuzzy white) |
| Texture | Smooth, thin film, leathery, wrinkled, uniform | Fuzzy, hairy, powdery, cotton-like, raised |
| Growth Pattern | Spreads evenly as a continuous pellicle | Distinct, often circular, fuzzy patches, aggressive |
| Odor (typically) | Yeasty, slightly sour, sometimes mild solvent-like | Musty, earthy, rotten, putrid, very unpleasant |
| Safety | Generally harmless (nuisance) | Potentially harmful (toxins) |
Olfactory and Taste Clues
Your nose is a powerful tool in fermentation. A healthy ferment should smell pleasantly sour, tangy, and fresh. If you detect kahm yeast, the aroma might be slightly yeasty, sometimes a bit musty, or even reminiscent of rubbing alcohol, especially if it's been present for a while. The taste, if you're brave enough to try a tiny bit after skimming, might be bland, off-puttingly yeasty, or slightly bitter, but it shouldn't taste putrid or rotten.
Mold, on the other hand, almost always announces itself with a distinctly unpleasant, acrid, or putrid odor. It will often smell overtly earthy, rotten, or like something that has truly spoiled. If your ferment smells genuinely foul, trust your instincts and err on the side of caution. As a general rule, if it smells bad, it likely is bad.
The Salvage Operation: Step-by-Step Recovery
Once you've confidently identified kahm yeast, it's time to act. Don't panic; methodical steps will give your ferment the best chance of recovery. Remember, speed and precision are your allies here.
Step 1: Assess and Isolate
- Don Gloves and Sterilize Tools: Always work with clean hands (use gloves for extra protection) and thoroughly sterilize any tools you'll be using (spoons, tongs, weights) with boiling water or a food-grade sanitizer.
- Remove Fermentation Weight: Carefully lift out any weights you're using. Inspect them for kahm yeast or other growth. If contaminated, clean and sterilize them immediately.
- Examine the Batch: Gently move the jar or crock to a well-lit area. Observe the kahm yeast's coverage. Is it a thin film or a thick, multilayered pellicle? Does it appear to have penetrated deep into the ferment, or is it confined to the surface?
Step 2: Skim and Remove
This is the most hands-on part of the salvage. The goal is to remove as much of the kahm yeast film as possible without disturbing the underlying ferment too much.
- Use a Sterilized Spoon or Ladle: Take your sterilized spoon or small ladle and carefully skim off the kahm yeast from the surface of the brine. Try to get under the film and lift it off in as large a piece as possible.
- Scrape Sides if Necessary: If the kahm yeast is clinging to the sides of the fermentation vessel, use the edge of your spoon or a clean, sterilized butter knife to gently scrape it off, allowing it to fall into the brine where you can then skim it.
- Discard Contaminated Layers: If the kahm yeast has formed a very thick, dense layer, or if it has visibly discolored or softened the very top layer of your vegetables, it's often best to remove and discard that top layer of vegetables along with the yeast. Better safe than sorry for texture and flavor.
- Repeat Until Clear: Continue skimming until the surface of your brine appears clear of kahm yeast. This might take several passes.

Step 3: Taste Test and pH Check
Once the kahm yeast is removed, it's time to evaluate the integrity of your ferment.
- Conduct a Smell Test: Take a deep sniff. Does it still smell pleasantly sour and tangy, or is there an off-odor remaining? If it smells genuinely foul, consider discarding.
- Small Taste Test (Optional but Recommended): If the smell is acceptable, take a very small piece of vegetable from *below* the former kahm yeast line. Chew it slowly. Does it taste good? Is it still crisp? If it tastes overly yeasty, bland, or significantly off, the flavor may be permanently compromised.
- Check pH Levels: For an objective measure, use pH strips or a pH meter. A healthy fermented vegetable should typically have a pH below 4.5, ideally below 4.0. If your pH is significantly higher (e.g., above 4.5-5.0 after several days of fermentation), the lactic acid bacteria may not have adequately acidified the environment, making it less safe and more prone to further issues.
Your senses are your best tools in fermentation. If your gut feeling tells you something is wrong after skimming, even if it looks okay, trust that instinct. It's better to lose a batch than risk your health or endure a disappointing flavor.
Step 4: Re-establish Optimal Conditions
After skimming and assessing, you need to create an environment that discourages kahm yeast and favors your beneficial lactic acid bacteria.
- Top Up Brine (if needed): Ensure all vegetables are fully submerged beneath the brine. If the level is low, mix a fresh batch of brine (using the same salt-to-water ratio as your original recipe) and carefully add it to cover everything. This is crucial for maintaining anaerobic conditions.
- Re-introduce Weights: Place your thoroughly cleaned and sterilized fermentation weights back on top of the vegetables to keep them submerged.
- Ensure Anaerobic Seal: Check your airlock or lid. Is it properly sealed? Is there enough water in the airlock? Kahm yeast thrives on oxygen, so minimizing its access is paramount. Consider a tighter seal or a different airlock mechanism if your current one seems to be letting in too much air.
Step 5: Monitor Closely and Patience
The salvage isn't over once you've cleaned up. The next few days are critical for monitoring.
- Observe Daily: For the next 3-5 days, check your ferment daily for any signs of kahm yeast returning. If it does, you may need to repeat the skimming process.
- Relocate if Necessary: If your fermentation area is too warm or exposed to too much direct light, consider moving it to a cooler, darker spot. Optimal temperatures for most vegetable ferments are 60-70°F (15-21°C).
- Allow Time to Recover: Give your ferment time to recover and for the lactic acid bacteria to reassert their dominance. The fermentation process might slow down slightly after the disturbance, but it should pick back up.
Beyond Salvage: Preventing Future Kahm Contamination
While salvaging a batch is satisfying, preventing kahm yeast in the first place is even better. Proactive measures are the hallmark of an experienced fermenter. Most kahm yeast outbreaks can be traced back to one or more lapses in ideal fermentation conditions.
Maintaining Anaerobic Conditions
Oxygen is kahm yeast's best friend. Your goal is to create an environment where lactic acid bacteria (LAB) can thrive without competition from oxygen-loving microbes.
- Use Proper Weights: Always keep your vegetables fully submerged under the brine. This means using fermentation weights (glass, ceramic, or clean rocks) that are heavy enough to hold everything down.
- Airlocks and Fermentation Lids: Invest in fermentation lids with airlocks or spring-loaded lids. These allow CO2 to escape while preventing oxygen from entering, creating a true anaerobic environment.
- Burping Jars: If you're using standard canning jars, burp them regularly to release CO2, but do so quickly and efficiently to minimize oxygen exposure. However, airlocks are far superior for preventing kahm.
Proper Sanitation
While wild fermentation relies on naturally occurring microbes, good sanitation practices reduce the chances of unwanted organisms, including kahm yeast, getting a head start.
- Sterilize Equipment: Always wash and sterilize your jars, weights, and any tools that will come into contact with your ferment. Boiling water, a diluted bleach solution (followed by thorough rinsing), or a food-grade sanitizer are all effective.
- Clean Vegetables: While you don't need to sterilize your vegetables (that would kill the beneficial LAB!), ensure they are thoroughly washed to remove any surface dirt or excessive microbial load.
Optimal Temperature Control
Temperature plays a crucial role in microbial activity. Kahm yeast can be more prevalent in warmer temperatures, where it can outcompete LAB in the initial stages.
- Maintain Consistent Temperatures: Aim for a consistent fermentation temperature, typically between 60-70°F (15-21°C) for most vegetable ferments. Avoid drastic temperature fluctuations.
- Cooler is Better (within reason): If you consistently struggle with kahm, try fermenting in a slightly cooler spot, as this often favors LAB growth over kahm yeast.
Sufficient Salt Concentration
Salt is not just for flavor; it's a critical component in creating a selective environment for lactic acid fermentation.
- Accurate Salt Ratios: Follow your recipe's salt concentration carefully. For most vegetable ferments, a 2-2.5% salt solution (by weight of vegetables + water) is ideal. Too little salt can allow undesirable microbes to flourish, including kahm yeast.
- Non-Iodized Salt: Always use non-iodized salt (like sea salt, kosher salt, or pickling salt). Iodine can inhibit beneficial bacteria.
Case Study: Sarah's Sauerkraut Success
How Sarah Conquered Kahm Yeast and Produced Pristine Kraut
Sarah, a passionate home fermenter, consistently battled kahm yeast on her sauerkraut batches. Her kraut would often develop a thin, white film within days, leading to off-flavors. After several frustrating discards, she sought my advice. We identified a few key issues: she was using a standard jar lid, not enough weight to keep all the cabbage submerged, and her kitchen was quite warm.
We implemented a three-pronged approach: First, she invested in airlock lids and glass fermentation weights, ensuring a truly anaerobic environment. Second, she moved her fermentation station to a cooler pantry, maintaining a steady 65°F (18°C). Third, we meticulously measured her salt concentration to 2.2% of the total vegetable and water weight. Within two weeks, her next batch of sauerkraut fermented beautifully, without a hint of kahm yeast. The flavor was crisp, clean, and perfectly sour, a testament to the power of understanding and controlling the fermentation environment. This resulted in her becoming a confident fermenter, sharing her knowledge with friends and never looking back at those early kahm-ridden days.

When to Toss: Knowing When to Give Up
While many batches can be salvaged, there are times when it's simply not worth the risk or the effort. Knowing when to cut your losses is a crucial skill for any fermenter. Trust your senses above all else.
- Fuzzy, Hairy, or Colored Mold: Any signs of green, black, pink, blue, or distinctly fuzzy growth are red flags. This is likely mold, which can produce harmful mycotoxins. Discard the entire batch immediately.
- Putrid or Rotten Smell: If your ferment smells like rotten eggs, sewage, strong ammonia, or anything truly foul, it's spoiled. A bad smell is a definitive indicator of dangerous microbial activity.
- Slimy Texture: While some ferments can develop a slightly viscous brine, an overtly slimy, snot-like texture throughout the vegetables themselves, especially if accompanied by off-odors, indicates spoilage.
- Discolored Vegetables: If the vegetables themselves are significantly discolored (beyond normal fermentation changes) or have become mushy and soft throughout, they are likely compromised.
- Persistent Kahm Yeast: If kahm yeast repeatedly returns within hours or a day after skimming, despite your best efforts to re-establish optimal conditions, the microbial balance may be too far gone to recover a quality product.
- pH Above 4.5 (after several days): If your ferment has been going for several days (e.g., 3-5 days or more) and its pH remains above 4.5, it hasn't acidified sufficiently to be safe. This indicates a failed fermentation.
| Sign of Contamination | Action |
|---|---|
| Fuzzy, colored mold | Discard immediately |
| Putrid or rotten smell | Discard immediately |
| Slimy, snot-like texture | Discard immediately |
| Vegetables significantly discolored/mushy | Discard immediately |
| Persistent Kahm Yeast (recurs quickly) | Consider discarding if flavor is compromised |
| pH > 4.5 after several days | Discard immediately |
The Science Behind Kahm Yeast and Fermentation Ecology
To truly master fermentation, it helps to understand the underlying microbiology. Wild fermentation is a complex dance between various microbial communities. Initially, many different microbes are present on your vegetables. The addition of salt and the creation of an anaerobic environment selectively favor lactic acid bacteria (LAB) such as Lactobacillus, Pediococcus, and Leuconostoc species.
These LAB consume sugars in the vegetables and produce lactic acid, which lowers the pH, creating an acidic environment that inhibits most spoilage organisms and pathogens. Kahm yeast, however, is a resilient opportunist. While LAB prefer anaerobic conditions, kahm yeasts are facultative anaerobes, meaning they can survive without oxygen but thrive in its presence. If oxygen is introduced, or if the initial LAB growth is slow (due to insufficient salt, low temperature, or poor sanitation), kahm yeast can seize the opportunity to proliferate on the surface, forming its characteristic pellicle.
Research, such as a pivotal study on microbial ecosystems in ferments, continually sheds light on the intricate balance. The presence of kahm yeast indicates that the selective pressure favoring LAB wasn't strong enough on the surface. By understanding this ecological battle, we can implement the strategies discussed earlier to tip the scales back in favor of our desired microbes, ensuring a healthy and successful ferment.
Frequently Asked Questions (FAQ)
Is kahm yeast always harmless? While kahm yeast is generally considered non-pathogenic and won't make you sick, its presence does indicate an imbalance in your ferment's ecosystem. It can lead to off-flavors, mushy textures, and, if left unchecked, can raise the pH, creating conditions where actual spoilage organisms could potentially thrive. So, while not directly harmful, it's a sign to intervene.
Can I eat food with kahm yeast? Technically, yes, you can eat food that has had kahm yeast on it after skimming, provided the underlying ferment smells and tastes good, and its pH is safely low (below 4.5). However, kahm yeast can impart unpleasant yeasty or off-flavors and soften the texture, making the eating experience less enjoyable. I always recommend skimming it off to preserve the quality and desired flavor profile of your ferment.
What if my ferment smells off but looks okay? Your nose is one of your most reliable tools in fermentation. If your ferment looks visually clear of mold and kahm yeast, but emits a genuinely unpleasant odor (rotten, putrid, sulfurous, or overly chemical), it's a strong indicator that something is amiss. Even if you don't see visible signs of spoilage, the smell suggests the presence of undesirable bacteria. In such cases, it's best to discard the batch to ensure food safety.
How quickly does kahm yeast grow? The speed of kahm yeast growth can vary depending on conditions like temperature, oxygen exposure, and nutrient availability. In ideal conditions for kahm (e.g., warmer temperatures, some oxygen exposure), it can appear as a thin film within 2-3 days. If conditions are less favorable, it might take a week or more, or not appear at all. Consistent monitoring is key during the initial stages of fermentation.
Can I reuse brine that had kahm yeast? It's generally not recommended to reuse brine that has previously hosted kahm yeast, especially if you're aiming for optimal flavor and preventing recurrence. Even after skimming, yeast spores can remain. Starting with fresh, properly salted brine ensures you provide the best possible environment for your beneficial lactic acid bacteria to dominate from the outset, minimizing the chances of another kahm outbreak.
Key Takeaways and Final Thoughts
Navigating the world of wild fermentation is a journey of discovery, and encountering kahm yeast is a common rite of passage. But as an experienced fermenter, I hope I've equipped you with the knowledge and confidence to approach this challenge not with despair, but with a clear, actionable plan.
- Identify Correctly: Distinguish kahm yeast (thin, white film) from dangerous mold (fuzzy, colored growth).
- Act Swiftly and Carefully: Skim off the kahm yeast using sterilized tools, ensuring you remove as much as possible.
- Assess and Adjust: Taste, smell, and pH check the ferment. Then, re-establish anaerobic conditions with weights and airlocks, and ensure proper salt and temperature.
- Prioritize Prevention: Focus on maintaining strict anaerobic conditions, proper sanitation, optimal temperature, and correct salt concentrations to minimize future occurrences.
- Trust Your Instincts: When in doubt, especially concerning smells or suspicious mold, it's always safer to discard the batch.
Remember, every batch, successful or challenged, is a learning opportunity. Don't let a bit of kahm yeast deter you from the incredible rewards of wild fermentation. With these strategies in hand, you're not just salvaging a batch; you're building resilience, expertise, and a deeper connection to your food. Keep fermenting, keep experimenting, and enjoy the delicious, probiotic-rich results that come from your efforts. For more insights on advanced fermentation techniques, explore resources like Cultures for Health's troubleshooting guides, or delve deeper into the science with materials from institutions like The National Center for Home Food Preservation.
Recommended Reading
- Mastering Dairy-Free Cream Sauces: 7 Pro Tips for Catering Stability
- Stop Inconsistent Cocktails: 5 Proven Strategies for Bar Staff Excellence
- Unlock Baking Secrets: Your Ultimate Guide to Sugar Substitutions
- Unlock the Secrets: How to Adapt Recipes for Air Fryer Family Meals?
- Stuck Fermentation? How to Restart Your Beer Safely, No Off-Flavors

0 Comentários: