 By
By 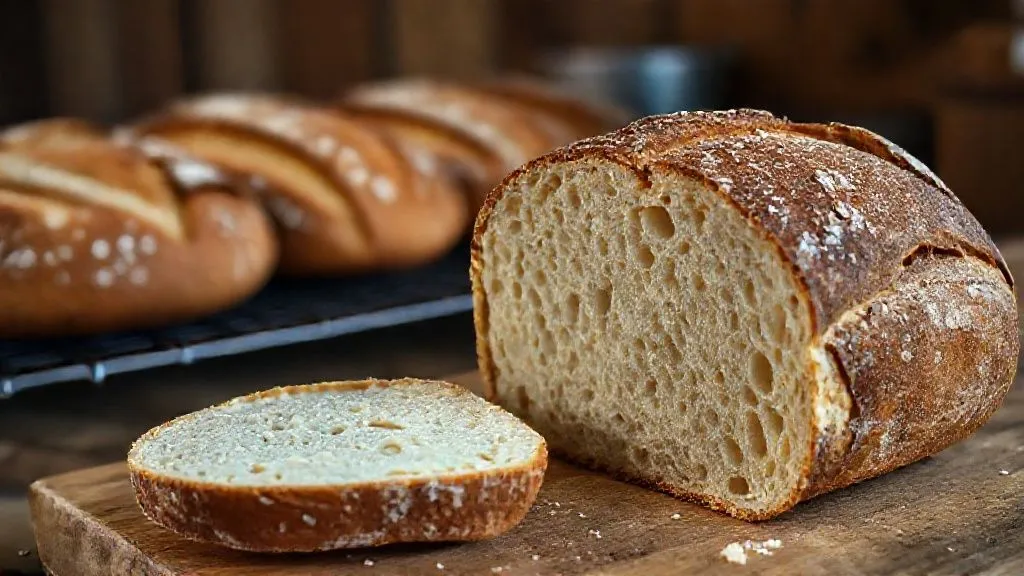
Solving Inconsistent Open Crumb in High Volume Artisan Loaves?
For over two decades in the artisan bread world, I've seen countless passionate bakers grapple with the elusive 'perfect crumb.' It's a badge of honor, a testament to skill, and often, a source of profound frustration. Especially when you scale up. The transition from baking a few beautiful loaves at home to consistently producing dozens, or even hundreds, with that signature open, airy crumb is where many hit a wall. I know, because I've been there, pulling my hair out over batches that were glorious one day and disappointingly dense the next.
The problem isn't just aesthetic; inconsistent open crumb impacts texture, flavor release, and ultimately, customer satisfaction. Dense spots, uneven holes, or a completely closed crumb in what should be an open-textured loaf can be a commercial nightmare, costing time, ingredients, and reputation. It’s a complex interplay of variables, and when you’re dealing with high volumes, even minor fluctuations can cascade into significant issues.
This isn't about quick fixes or magic tricks. Today, I'm going to share the deep insights and practical, actionable strategies I've honed over years of trial, error, and meticulous observation. We'll dive into the fundamental principles and advanced techniques required for Solving inconsistent open crumb in high volume artisan loaves, equipping you with the knowledge to achieve that coveted, consistent, and truly stunning crumb structure every single time.
Understanding the Crumb Conundrum: More Than Just Bubbles
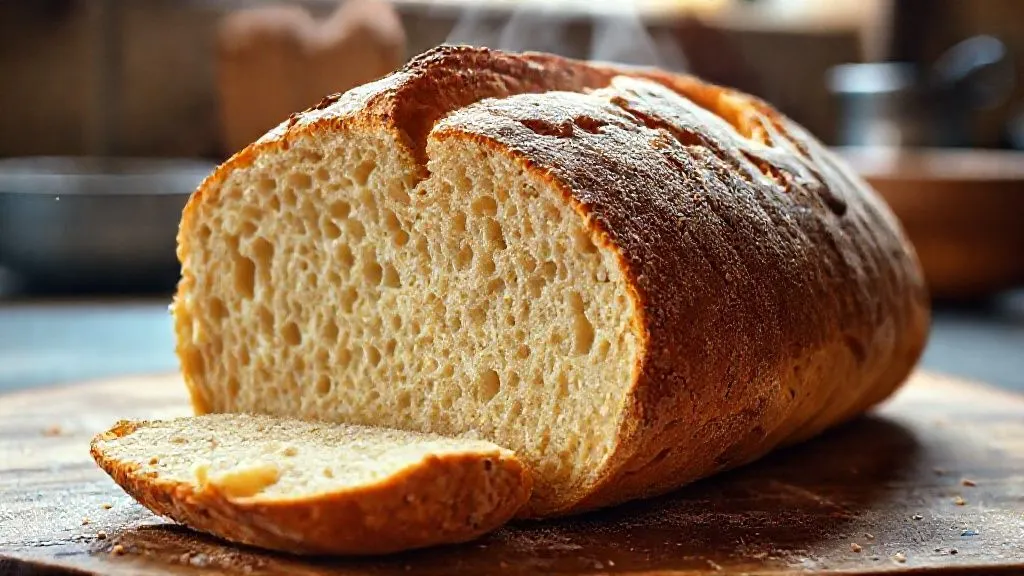
Before we can fix inconsistencies, we must understand what makes an open crumb possible. It's not simply about 'more air'; it's about a delicate, interconnected network of gas pockets suspended within a strong, elastic gluten matrix. This matrix forms during mixing and fermentation, capturing the CO2 produced by yeast and bacteria. The size and distribution of these pockets, and the thinness of their cell walls, define the crumb structure.
When baking in high volumes, the biggest challenge is maintaining uniformity across all loaves. Batch variations in flour absorption, ambient temperature, mixing efficiency, and even the subtle handling differences between bakers can all contribute to an inconsistent crumb. It's a constant battle against entropy, demanding precise control and a deep understanding of dough rheology.
The Delicate Dance of Gluten and Gas
Gluten, formed when water interacts with proteins in flour, creates the extensible network crucial for an open crumb. Without sufficient gluten development, the dough can't trap gas effectively, leading to a dense, cake-like texture. But too much development, or tearing the gluten, can also lead to issues. The goal is to develop a strong yet pliable network that can stretch without breaking, allowing gas to expand beautifully during proofing and oven spring. Understanding this dynamic is the first step towards Solving inconsistent open crumb in high volume artisan loaves.
"The baker's true craft lies not just in following a recipe, but in understanding the living, breathing nature of dough and adapting to its subtle cues in real-time."
Mastering Dough Hydration: The Foundation of Open Crumb
Hydration is perhaps the single most critical factor in achieving an open crumb. Higher hydration doughs generally yield a more open structure because the increased water content facilitates gluten development and makes the dough more extensible. However, working with very high hydration in large volumes introduces handling challenges and can lead to a soupy, unmanageable mess if not approached correctly.
In high-volume production, precise hydration means more than just measuring water. It means understanding your flour. Different flours, even from the same mill, can have varying protein contents and absorption rates depending on the harvest. I always recommend performing a simple 'hydration test' with each new batch of flour.
- Start with a Known Hydration: Use your standard recipe's water percentage for a small test batch.
- Observe Dough Feel: Note how the dough feels – is it too stiff, too slack, or just right?
- Adjust Incrementally: For subsequent test batches, adjust water by 1-2% until you achieve the desired consistency for your specific shaping methods.
- Document Findings: Keep a detailed log of flour type, lot number, and optimal hydration percentage.
This iterative process allows you to fine-tune your hydration for each flour batch, a crucial step in ensuring consistency. Remember, a slightly slacker dough will often yield a more open crumb, but it requires more careful handling and development.

Precision in Mixing and Gluten Development for Large Batches
For high-volume production, mixer efficiency and technique are paramount. Over-mixing can tear the gluten, leading to a dense crumb, while under-mixing results in weak dough incapable of holding gas. The goal is optimal gluten development – a strong, elastic network that passes the 'windowpane test' consistently across every batch.
Optimizing Your Mixer for Artisan Dough
Spiral mixers are generally preferred for artisan dough due to their gentle action and ability to handle stiff doughs without overheating. However, even with the right equipment, technique matters. I've found that a specific mixing regimen yields the best results:
- Autolyse Phase (30-60 minutes): Combine flour and water only. This allows the flour to fully hydrate and enzymes to begin breaking down starches, kickstarting gluten development without mechanical action. This step is critical for developing extensibility.
- Initial Mix (Low Speed, 5-7 minutes): Add starter/levain and salt. Mix on the lowest speed until everything is just incorporated and no dry spots remain. This prevents salt from inhibiting yeast activity too early and ensures even distribution.
- Intensive Mix (Medium Speed, 8-12 minutes): Increase speed to medium. The dough should start pulling away from the sides of the bowl, becoming smooth and elastic. Perform a windowpane test every few minutes. Stop mixing as soon as the dough passes the test consistently.
- Dough Temperature Control: Monitor dough temperature throughout mixing. Friction from the mixer can generate heat, which accelerates fermentation. Aim for a final dough temperature between 75-78°F (24-25.5°C) to maintain predictable bulk fermentation times. Use ice water if necessary.
Consistency in mixing time and speed, along with careful temperature monitoring, is non-negotiable for Solving inconsistent open crumb in high volume artisan loaves. According to a study published by King Arthur Baking Company, proper gluten development is the single most important factor for crumb structure, often more so than hydration alone.
The Critical Role of Bulk Fermentation: Timing and Temperature Control
Bulk fermentation, or the first rise, is where the magic truly happens. It's when the yeast and bacteria in your starter produce the gas that creates the open crumb, and when the gluten network continues to strengthen and mature. In high-volume settings, managing this phase across multiple large dough batches simultaneously is a significant challenge.
Temperature is your primary lever. A difference of even a few degrees can drastically alter fermentation speed. I rely on a controlled environment, often a dedicated proofing room or temperature-controlled racks, to ensure all doughs ferment at the same rate. This predictability is vital for consistency.
Monitoring Fermentation Progression
Visual cues are important, but for high volume, you need more objective measures:
- Volume Increase: Aim for a 30-50% increase in volume, depending on your desired crumb and flour type.
- Dough Jiggle and Aeration: The dough should feel light and airy, with visible bubbles on the surface.
- pH Measurement: For advanced control, monitoring pH can provide a precise indicator of fermentation progress. A drop from around 5.5-6.0 to 4.2-4.5 often signals optimal bulk fermentation for sourdough.
During bulk fermentation, I always incorporate 2-3 sets of 'stretch and folds' within the first 2-3 hours. This builds dough strength, redistributes yeast and food, and evens out dough temperature, further enhancing crumb consistency.
Case Study: The Rise of 'Crumb Perfect Bakery'
Crumb Perfect Bakery, a mid-sized artisan operation, struggled with batches where some loaves had a beautiful open crumb, while others from the same mix were dense. Their issue was traced to inconsistent bulk fermentation temperatures across their large dough tubs. By investing in a temperature-controlled proofing chamber and implementing a strict schedule of stretch and folds, they achieved remarkable uniformity. Their 'dense crumb' complaints plummeted by 80% within three months, leading to a significant increase in customer satisfaction and a reputation for consistently exceptional bread.
| Fermentation Stage | Target Temp (°F) | Key Action |
|---|---|---|
| Initial Mixing | 75-78 | Gluten Development, Hydration |
| Bulk Fermentation (Start) | 72-75 | Gas Production, Strength Building |
| Bulk Fermentation (End) | 72-75 | Volume Increase, pH Drop |
| Cold Retard (Optional) | 38-40 | Flavor Development, Slow Fermentation |
Strategic Shaping and Tension for Optimal Structure
Shaping is often underestimated in its impact on crumb structure, especially when dealing with large, high-hydration doughs. The goal isn't just to create a pleasing exterior; it's to create internal tension and a robust 'skin' that will help the loaf hold its shape and expand upwards during baking, rather than spreading outwards. This tension is crucial for an open crumb.
For high-volume production, consistency in shaping technique across your team is paramount. I've found that hands-on training and clear visual demonstrations are far more effective than just written instructions. Every baker needs to develop a consistent 'feel' for the dough.
Techniques for Large Artisan Loaves:
- Gentle Handling: Avoid degassing the dough excessively. Each fold and turn should be purposeful, preserving as much trapped gas as possible.
- Develop Surface Tension: Whether you're doing a boule or a batard, the final shaping step should create a taut surface. This acts like a skin, directing oven spring upwards and preventing the crumb from collapsing.
- Consistent Seams: Ensure all seams are properly sealed and placed on the bottom. An unsealed seam can lead to blowouts and an uneven crumb.
- Proofing Basket Flour: Use a consistent amount and type of flour (rice flour is excellent) in your bannetons to prevent sticking, which can tear the delicate surface tension you've worked so hard to create.
For more insights into the science of shaping, I highly recommend exploring resources from institutions like The Bread Lab at Washington State University, which delve into the mechanics of dough handling. Mastering shaping is a significant step in Solving inconsistent open crumb in high volume artisan loaves.

Proofing Protocol: The Final Ascent to an Open Crumb
Proofing, or the final rise, is the last chance for your dough to develop gas and relax its gluten structure before hitting the oven. This stage is incredibly delicate, and inconsistencies here are a major culprit for uneven crumb. Over-proofed dough collapses, leading to a dense, flat loaf. Under-proofed dough tears erratically, resulting in large, isolated holes and a dense overall structure.
For high-volume bakeries, cold proofing (retarding) in a refrigerated environment is a game-changer. It slows down fermentation dramatically, allowing for extended proofing times (12-24 hours or more) which develops deeper flavor and provides a wider window of usability for your dough. This consistency in timing is invaluable.
Optimizing Your Proofing Environment:
- Consistent Temperature: Maintain a stable temperature in your walk-in or proofing retarder, typically 38-40°F (3-4°C). Fluctuations can cause uneven proofing.
- Humidity Control: While less critical than temperature for cold proofing, ensuring the dough doesn't dry out is important. Covered containers or a humid environment prevents skinning.
- The Poke Test (with caveats): While useful, the poke test can be subjective. For high volume, combine it with a strict timing protocol based on your flour, hydration, and ambient temperature.
I've seen many operations fail to achieve consistency simply because their proofing environment isn't stable. Investing in reliable refrigeration and monitoring systems pays dividends in the long run. The goal is to hit that sweet spot of 'just right' proofing, where the dough has enough strength to hold its shape but enough extensibility to expand beautifully. This meticulous control is key for Solving inconsistent open crumb in high volume artisan loaves.

Baking Dynamics: Heat, Steam, and the Oven Spring Miracle
The moment your perfectly proofed loaf hits a hot oven is the culmination of all your hard work. Oven spring, the rapid expansion of the dough in the first 10-15 minutes of baking, is crucial for an open crumb. This expansion is driven by residual yeast activity and the rapid vaporization of water within the dough, creating steam internally.
For high-volume production, achieving consistent oven spring across multiple loaves requires a robust oven setup and precise steam management. Deck ovens or large commercial convection ovens with steam injection capabilities are ideal. The initial burst of steam is critical; it keeps the crust pliable, allowing the loaf to expand fully before the crust sets.
Key Baking Considerations:
- Preheat Thoroughly: Ensure your oven, and especially your baking surface (deck), is fully preheated to the target temperature. A cold oven will kill oven spring.
- Steam Injection: Introduce a generous amount of steam immediately upon loading the loaves. Maintain steam for the first 10-15 minutes. If your oven lacks steam injection, consider using a Dutch oven method (though impractical for high volume) or placing a tray of hot water/ice in the oven.
- Temperature Drop: After the initial steam phase, vent the steam and drop the oven temperature to allow the crust to set and brown.
- Loading Consistency: Load loaves quickly and efficiently to minimize heat loss. An uneven load can lead to varying oven spring.
Monitoring your oven's performance, calibrating thermometers regularly, and understanding how heat distributes within your specific oven are essential. A slight temperature variance across your deck can mean the difference between a soaring, open crumb and a flat, dense one. This attention to detail is paramount for Solving inconsistent open crumb in high volume artisan loaves.

Quality Control and Iteration: Your Path to Consistency
Even with meticulous processes, variations can creep in. The hallmark of a truly expert baker, especially in a high-volume setting, is the ability to identify subtle inconsistencies, diagnose their root cause, and implement corrective actions. This requires rigorous quality control and a commitment to continuous improvement.
Implementing a Feedback Loop:
- Daily Crumb Evaluation: Slice open a representative loaf from each batch daily. Photograph and document its crumb structure.
- Batch Tracking: Link crumb quality back to specific batch parameters (flour lot, hydration, mixing time, bulk fermentation time/temp, proofing time/temp, baker).
- Team Debriefs: Regularly discuss findings with your baking team. Foster an environment where issues are seen as learning opportunities, not failures.
- Adjust and Re-test: Based on your data, make small, incremental adjustments to your process. Only change one variable at a time to isolate its effect.
This systematic approach, akin to scientific experimentation, is the most robust way to consistently improve and maintain crumb quality. As food science writer Harold McGee often emphasizes, understanding the 'why' behind baking processes empowers us to adapt and innovate. This iterative process is how you become truly adept at Solving inconsistent open crumb in high volume artisan loaves.
| Date | Batch ID | Crumb Score | Notes |
|---|---|---|---|
| 2023-10-26 | SD-001 | 4/5 (Good) | Slightly denser in one corner. Bulk ferment 74F, 4.5 hrs. Baker: Alex |
| 2023-10-27 | SD-002 | 3/5 (Inconsistent) | Large, uneven holes. Proofing fridge temp fluctuated to 42F. Baker: Maria |
| 2023-10-28 | SD-003 | 5/5 (Excellent) | Perfect open crumb. Bulk ferment 73F, 4.75 hrs. Baker: Alex |
| 2023-10-29 | SD-004 | 2/5 (Dense) | Very dense crumb, no oven spring. Oven preheat temp found to be 50F too low. Baker: Maria |
Frequently Asked Questions (FAQ)
Q: My high hydration dough feels too sticky in large batches, making shaping difficult. How can I manage this without reducing hydration? A: The key is developing exceptional dough strength through proper mixing and stretch and folds during bulk fermentation. Ensure your mixer is developing the gluten fully. Using wet hands or a minimal amount of water (not flour) on your work surface can help with handling sticky dough. Also, a longer cold retard can firm up the dough, making it easier to handle. Don't compromise hydration; focus on strength and technique.
Q: I'm getting large, isolated tunnels instead of an even open crumb. What's going wrong? A: This often points to under-proofed dough or inconsistent shaping. Under-proofed dough lacks the extensibility to expand uniformly, leading to large, trapped gas pockets that burst during baking. Inconsistent shaping, especially trapping large air pockets during the initial stages, can also cause this. Review your bulk fermentation timing and ensure your shaping technique is gently but firmly building consistent tension without trapping air.
Q: How do environmental factors like humidity in my bakery affect crumb consistency? A: Humidity primarily affects the dough's surface. In a very dry environment, the dough can form a skin too quickly, inhibiting expansion and leading to a tighter crumb or blowouts. In very humid conditions, the dough might become excessively sticky. While temperature is more critical, try to maintain moderate humidity. For bulk fermentation, covered containers can help regulate surface moisture.
Q: Is it possible to achieve an open crumb with lower hydration doughs for specific bread types? A: While higher hydration generally correlates with a more open crumb, it's certainly possible to achieve a beautiful, relatively open crumb with lower hydration doughs. The focus shifts even more heavily to exceptional gluten development through thorough mixing and aggressive stretch and folds, as well as precise bulk fermentation and shaping to maximize strength and gas retention. It will naturally be less 'airy' than a very high hydration crumb, but still open and appealing.
Q: My loaves often have a dense band at the bottom. What's causing this? A: A dense band at the bottom is typically an indicator of under-proofing or insufficient heat transfer from the baking surface. Ensure your dough is fully proofed. Also, make sure your oven deck or baking stone is thoroughly preheated for at least an hour to ensure maximum heat saturation. A cooler baking surface means less initial spring from the bottom, leading to a denser base.
Key Takeaways and Final Thoughts
Solving inconsistent open crumb in high volume artisan loaves is a journey of continuous refinement, not a destination. It demands a scientific approach, keen observation, and an unwavering commitment to detail at every stage of the baking process. There's no single 'secret ingredient,' but rather a symphony of perfectly executed steps.
- Master Hydration: Understand your flour and adjust water content for optimal extensibility.
- Perfect Gluten Development: Use precise mixing techniques and monitor dough temperature.
- Control Bulk Fermentation: Leverage temperature and time to ensure uniform gas production and dough strength.
- Shape with Purpose: Create consistent surface tension without degassing the dough.
- Optimize Proofing: Utilize cold retardation for flavor and a wider window of usability.
- Command Your Oven: Ensure consistent heat and steam for maximum oven spring.
- Embrace Iteration: Implement a robust quality control and feedback loop.
I understand the frustration that comes with inconsistent results, but I promise you, with these strategies and a dedicated approach, you can transform your baking operation. Embrace the challenge, trust the process, and soon you'll be consistently producing artisan loaves with the kind of open, airy crumb that delights customers and fills you with pride. Your dedication to the craft will shine through in every perfect slice.
Recommended Reading
- Mastering Global Recipes: 7 Steps to Standardize Complex Cooking Terms
- Mastering Large-Batch Pickling: 7 Steps to Halt Anaerobic Spoilage
- Commercial Mole Emulsification: 7 Steps to Perfect Paste Consistency?
- Mastering the Sous Vide Sear: 7 Steps to Perfect Crust, No Overcooking
- Why Do My Homemade Pickles Keep Molding or Going Soft? 7 Fixes
0 Comentários: