 By
By 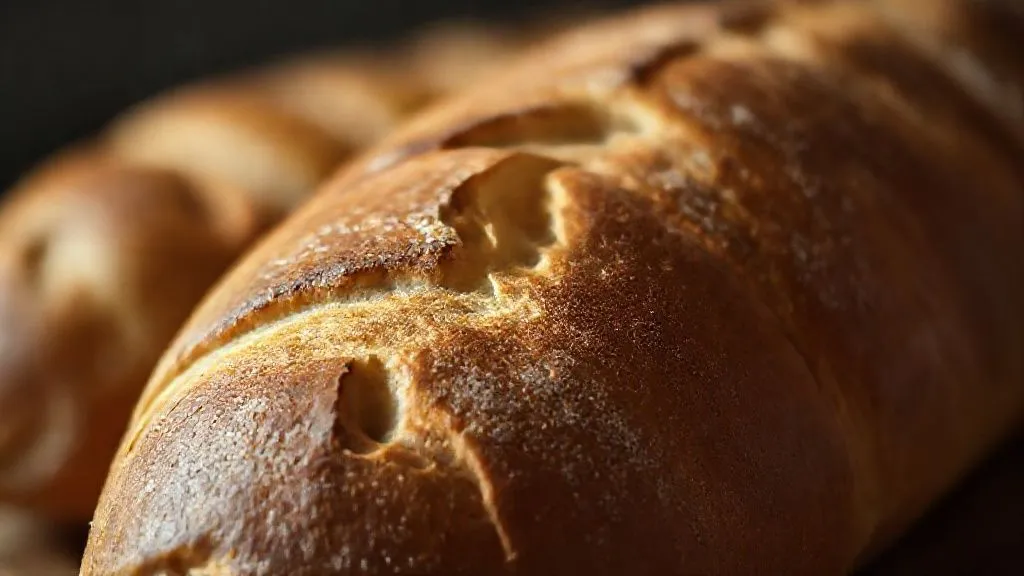
Why Do My Baguette Seams Burst After Shaping During Proofing?
For over two decades immersed in the nuanced world of artisan bread, I've witnessed countless aspiring bakers grapple with the elusive baguette. One of the most disheartening sights, after pouring effort into dough development and shaping, is pulling a beautifully browned baguette from the oven only to find its seam has violently burst open, creating an unsightly gash instead of a clean, controlled expansion.
This isn't just an aesthetic issue; a bursting seam signals a fundamental imbalance in your baking process. It's a frustrating setback that can make even experienced bakers question their technique, often leading to a cycle of trial and error that wastes precious ingredients and time.
But fear not, fellow bread enthusiast! In my extensive experience, I've pinpointed the precise factors that contribute to this common problem. This comprehensive guide will equip you with the expert knowledge and actionable strategies to diagnose why your baguette seams burst after shaping during proofing, and more importantly, how to prevent it, ensuring every baguette emerges with a proud, pristine crust and a perfectly controlled expansion.
The Foundation: Understanding Dough Development and Gluten Strength
Before we even touch shaping, the journey to a perfect baguette begins with your dough. A weak or improperly developed dough is like building a house on sand – it's destined to crumble under pressure, especially during proofing and baking.
Gluten Formation: The Network of Strength
Gluten, the protein network formed when flour and water combine, is the very backbone of your bread. It provides the elasticity that allows your dough to stretch without tearing, and the extensibility that enables it to expand gracefully. If your gluten isn't properly developed through adequate mixing and kneading, your dough simply won't have the structural integrity to hold a tight seam.
I always emphasize the 'windowpane test' for a reason. A well-developed dough should be able to stretch thinly enough to allow light to pass through without tearing. This indicates a strong, flexible gluten network capable of containing the gases produced during fermentation.
Hydration's Dance: Too Wet, Too Sticky?
Hydration levels play a critical role. While high-hydration doughs are prized for their open crumb, they are also inherently more challenging to handle and shape. If your dough is too wet for your skill level or the flour's absorption capacity, it can be nearly impossible to achieve the necessary surface tension and a strong, sealed seam.
"A dough that's too slack or sticky due to excessive hydration will resist forming a taut skin during shaping, making it prone to seam rupture under the pressure of fermentation gases."
Conversely, a dough that's too dry can be stiff and lack extensibility, also leading to tears. The key is finding the sweet spot for your specific flour and recipe, and being prepared to adjust slightly. For new bakers, I often recommend starting with a slightly lower hydration (around 68-70%) to build confidence before venturing into wetter doughs. For more on the science of dough hydration, I recommend this article from King Arthur Baking.
Mastering the Shaping Technique: The Art of Tension
This is where many bakers encounter their first major hurdle. Baguette shaping isn't just about making a log; it's about creating a precisely tensioned skin that will hold its form and guide expansion. A weak seam is almost always a result of inadequate tension or improper sealing during shaping.
The Critical First Fold
After a gentle pre-shape (if your recipe calls for it), the first step in final shaping is crucial. Degas your dough gently, then flatten it into a rough rectangle. Fold the top edge down to meet the middle, pressing firmly to seal. This creates the initial tension. Then, fold the bottom edge up to meet the top, again pressing firmly along the seam.

Building the Spiral: Creating Surface Tension
The next step is to create the spiral. This is where the magic happens, building layers of tension that will protect your seam. Roll the dough away from you, starting from the folded edge, applying gentle but firm pressure with the heels of your hands. Each roll should overlap slightly, progressively tightening the dough into a cylinder.
- Flatten & Degas: Gently flatten your dough into a rectangle, expelling large gas bubbles but retaining some air.
- Top Fold: Fold the top third of the dough down to the center, pressing firmly to seal.
- Bottom Fold: Fold the bottom third up to meet the top edge, again pressing firmly.
- Half Fold & Seal: Fold the entire rectangle in half lengthwise, bringing the top edge over the bottom. This creates your primary seam.
- Pinch & Roll: Using the heel of your hand, pinch and seal this seam along its entire length. Then, gently roll the dough back and forth, elongating it to the desired baguette length while maintaining even tension from end to end.
The Final Seal: Ensuring a Robust Seam
The seam itself needs to be robustly sealed. After you've created your final cylinder, flip the baguette over so the seam is facing upwards. Using the edge of your hand or your fingertips, firmly pinch the seam together along its entire length. This isn't just a gentle press; it's a deliberate action to meld the two sides of the dough into a single, strong bond.
"A well-sealed seam is the primary defense against blowouts. It must be a continuous, strong bond, not just a superficial join."
If your dough is too dry, it won't seal. If it's too wet, it will stick to everything but itself. This reiterates the importance of proper hydration and dough development. Practice is key here; a smooth, even seam is a hallmark of an experienced baker.
Proofing Perfection: The Fine Line Between Under and Over
Once shaped, your baguettes enter the proofing stage, a critical period where the yeast continues its work, expanding the dough and building flavor. This is often where the 'why do my baguette seams burst after shaping during proofing?' question truly comes into play, as the integrity of your seam is tested under internal pressure.
The Ideal Proofing Environment
Proofing conditions significantly impact the dough's ability to hold its shape. Too cold, and the dough proofs too slowly, potentially drying out the surface. Too warm, and it proofs too quickly, risking over-proofing and weakening the gluten structure.
| Condition | Ideal Range | Impact on Seams |
|---|---|---|
| Temperature | 70-75°F (21-24°C) | Moderate activity, even gas production |
| Humidity | 75-85% (covered) | Prevents skin from drying, maintains elasticity |
| Time | 45-90 minutes (depends on temp) | Allows gluten to relax, strengthens structure |
I recommend proofing baguettes seam-side up on a floured couche (linen cloth) or a perforated baguette pan, covered loosely with plastic wrap to maintain humidity. This prevents the top from drying out and provides support.
Spotting the Signs of Under-Proofing
An under-proofed baguette will have a very strong, tight gluten network that hasn't relaxed enough. When it hits the hot oven, the sudden burst of activity (oven spring) can be too aggressive for the unrelaxed dough, causing the weakest point – the seam – to rupture violently. The dough simply doesn't have the extensibility to expand gracefully.
Signs of under-proofing include: very little increase in size, dough feeling dense and stiff, and a lack of 'jiggle' when gently nudged. The poke test will show the dough springing back immediately and completely.
The Dangers of Over-Proofing
Conversely, an over-proofed baguette is perhaps the most common culprit for bursting seams. When dough over-proofs, the gluten network begins to degrade. It becomes weak, fragile, and loses its elasticity. It's like an over-inflated balloon – the material is stretched to its limit and has no more capacity to expand. When placed in the oven, the fragile gluten simply can't hold up to the internal gas pressure, and the seam, being the point of least resistance, gives way dramatically.
Signs of over-proofing: dough feels very airy and fragile, has significantly increased in size, and the poke test leaves a permanent indentation. It may also look slightly deflated or wrinkled.
Case Study: The Baker's Proofing Predicament
Sarah, a talented home baker, consistently struggled with burst seams on her baguettes. Her shaping technique seemed solid, and her dough felt strong. After consulting with me, we discovered her kitchen was unusually warm, and she was proofing her baguettes for a standard 90 minutes, as per her recipe. However, in her warmer environment, this was causing severe over-proofing. By reducing her proofing time to 45-60 minutes and relocating her proofing spot to a slightly cooler area, her baguettes began to emerge with perfectly sealed seams and controlled expansion. This seemingly small adjustment highlighted how crucial environmental factors are to successful proofing.
Understanding proofing nuances is key. For more in-depth guidance on achieving perfect proofing, I highly recommend this resource from The Perfect Loaf.
The Critical Role of Scoring (Coupe)
Scoring, or 'coupe', is not merely decorative; it's a functional art. It's your way of telling the baguette exactly where you want it to expand. If you don't score properly, or at all, the dough will find the path of least resistance – which is often your carefully constructed seam.
Why We Score: Guiding Expansion
When a baguette hits the hot oven, the rapid expansion of gases (oven spring) creates immense internal pressure. Scores act as controlled release points, allowing the dough to expand upwards and outwards in a predictable, beautiful fashion. Without these intentional cuts, the pressure builds until it finds a weak point, often tearing open the seam or other random spots.

Angle, Depth, and Overlap: Precision is Key
Proper scoring technique is paramount:
- Sharp Blade: Always use a very sharp blade (a baker's lame is ideal). A dull blade will drag and tear the dough, creating ragged edges that don't expand cleanly.
- Angle: Hold the blade at a shallow angle (about 30-45 degrees) to the surface of the dough. This creates a 'lip' that will lift and expand beautifully.
- Depth: Aim for a depth of about 1/4 to 1/2 inch (0.5-1 cm). Too shallow, and it won't guide expansion effectively. Too deep, and it can weaken the crust structure, leading to collapse.
- Overlap: Each score should overlap the previous one by about 1/3 to 1/2. This ensures continuous expansion along the length of the baguette.
"Think of scoring as drawing a roadmap for your oven spring. Without a clear map, the dough will wander off-course, often through your seam."
Practice your scoring on a piece of scrap dough or even a soft fruit. The goal is confident, swift, and decisive cuts.
Oven Spring and Steam: The Final Act
The journey isn't over until the baguette is out of the oven. The environment inside your oven during the initial stages of baking plays a significant role in how your baguette's crust, and by extension, its seam, behaves.
The Power of Steam
Steam in the oven during the first 10-15 minutes of baking is non-negotiable for baguettes. A humid environment keeps the surface of the dough moist and pliable, allowing it to stretch and expand without forming a hard crust too quickly. If the crust sets too soon due to a lack of steam, the internal pressure from the rapidly expanding gases has nowhere to go but out through the weakest point – often the seam.
Methods for creating steam include: a preheated Dutch oven, a pan of hot water on the bottom rack, or spraying the oven walls with water. My preferred method for multiple baguettes is a cast iron pan preheated on the bottom rack, into which I pour boiling water immediately after loading the bread. For a deeper dive into the role of steam, Serious Eats offers an excellent explanation.
Maximizing Oven Spring
A properly preheated oven, often at a very high temperature (450-500°F or 230-260°C), provides the initial thermal shock necessary for maximum oven spring. This rapid expansion contributes to a light, airy crumb and a crisp crust. If your oven temperature is too low, or if you lose too much heat when loading the bread, the dough may not get the energetic lift it needs, leading to a denser crumb and potentially uneven expansion that stresses the seam.
Troubleshooting Your Baguette Seam Bursts
Let's consolidate the common problems and their solutions to help you quickly identify and rectify your baguette seam issues.
Common Scenarios and Solutions
| Problem | Likely Cause | Solution |
|---|---|---|
| Seam bursts violently, often in one large gash. | Under-proofing or very aggressive oven spring on an unrelaxed dough. | Increase proofing time slightly, ensure proper gluten relaxation. Improve scoring to guide expansion. |
| Seam bursts open and dough looks deflated or wrinkled around the burst. | Over-proofing or weak gluten structure. | Reduce proofing time, especially in warm environments. Focus on better dough development (mixing/kneading) to strengthen gluten. |
| Seam is visible and opens slightly, but not a huge burst. Crust is thick. | Insufficient steam in the oven, causing the crust to set too early. | Increase steam during the first 10-15 minutes of baking. Ensure oven is fully preheated. |
| Seam bursts randomly, not always in the same spot, or tears are jagged. | Poor shaping technique (insufficient tension or sealing) or dull scoring blade. | Refine shaping to create consistent tension and a robust seam. Use a very sharp lame for clean, decisive scores. |
| Dough is stiff and tears easily during shaping or proofing. | Under-hydrated dough or underdeveloped gluten. | Increase hydration slightly, ensure adequate mixing/kneading for gluten development. |

Frequently Asked Questions (FAQ)
Can I fix a bursting seam mid-proof? Unfortunately, once a seam begins to burst during proofing, it's very difficult to 'fix' it without damaging the delicate gluten structure. Attempting to re-seal it will likely degas the dough and result in a dense, misshapen loaf. Your best bet is to proceed with baking, learn from the mistake, and adjust your next batch. Prevention through proper shaping and proofing is key.
Is high hydration dough more prone to bursting seams? Yes, generally. High hydration doughs are more extensible but less elastic, and their stickiness makes achieving a strong, tight seam more challenging. They require more experience in handling and shaping to build sufficient surface tension without tearing. As your skill improves, you can gradually increase hydration.
How does my oven's steam affect seam integrity? Steam is crucial. Without sufficient steam in the initial phase of baking, the crust forms too quickly and becomes rigid. This prevents the dough from expanding freely through the scores. The internal pressure then builds up and, with no other release point, often forces its way out through the weakest part, which is typically the seam. Steam keeps the crust pliable, allowing for graceful expansion.
What's the ideal proofing temperature and humidity? For baguettes, an ideal proofing temperature is typically 70-75°F (21-24°C). Combined with high humidity (around 75-85%), this allows for steady fermentation without the dough surface drying out. Drying can create a skin that restricts expansion and contributes to seam bursts. Using a covered proofing box or a couche under plastic wrap helps maintain this environment.
Does the type of flour impact seam strength? Absolutely. Flours with higher protein content (like bread flour) develop stronger gluten networks, which are more resilient and can better withstand the pressures of proofing and oven spring. Weaker flours (like all-purpose flour, depending on brand) may result in a more fragile dough that is prone to tearing and seam bursting, even with perfect shaping. Using a good quality bread flour is highly recommended for baguettes.
Key Takeaways and Final Thoughts
The frustration of a bursting baguette seam is a rite of passage for many bakers. However, by understanding the underlying causes, you can transform this challenge into a mastery of technique. Remember these critical points:
- Dough Development is Paramount: Ensure strong, elastic gluten through proper mixing and hydration.
- Shaping is About Tension: Create a taut skin and a robust, sealed seam to provide structural integrity.
- Proofing is a Balancing Act: Avoid both under-proofing (too rigid) and over-proofing (too weak) to maintain dough strength.
- Score with Precision: Use a sharp blade and correct technique to guide expansion and relieve internal pressure.
- Embrace the Steam: A humid oven environment is essential for a pliable crust that allows for graceful oven spring.
Baking perfect baguettes is a journey of continuous learning and refinement. Don't be discouraged by setbacks; instead, view them as opportunities to hone your craft. By applying these expert insights and focusing on the details, you'll soon be pulling consistently beautiful, perfectly seamed baguettes from your oven, a testament to your growing skill and dedication. Happy baking!
Recommended Reading
- Still Hazy Beer? 7 Expert Strategies When Cold Crashing & Fining Fail
- Easy Air Fryer Recipes: Simple Meals for Beginners in Minutes
- 7 Air Fryer Hacks for Peak Performance & Balanced Nutrition
- 5 Stress-Free Meal Prep Hacks for Burnt-Out Professionals?
- 9 Reasons: What Causes Inconsistent Flavor in Mass-Produced Pickles?


0 Comentários: