 By
By 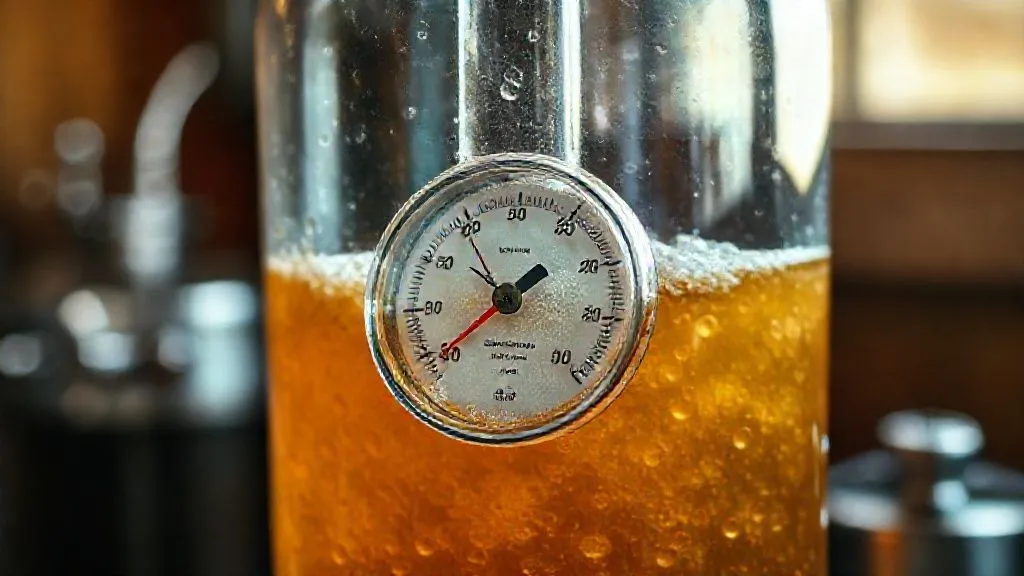
What causes inconsistent final gravity in complex homebrew kits?
After two decades immersed in the art and science of homebrewing, I've witnessed the full spectrum of emotions a brewer can experience. From the pure joy of a perfect pour to the gnawing frustration when a batch just doesn't hit the mark. One of the most common and perplexing issues I've seen even experienced brewers grapple with is the elusive beast of inconsistent final gravity (FG).
That moment when your hydrometer stubbornly refuses to settle at the predicted reading, leaving you in a state of brewing limbo, is truly disheartening. It’s not just about hitting a number; it’s about the very character of your beer – its alcohol content, mouthfeel, sweetness, and overall balance are all dictated by that final attenuation. For those working with complex homebrew kits, the variables multiply, making the problem even more opaque.
But fear not, fellow brewers. I'm here to demystify the core issues behind inconsistent final gravity. In this comprehensive guide, I'll share my insights, reveal the often-overlooked culprits, and provide you with actionable frameworks to achieve consistent, predictable results in even the most intricate homebrew kits. We'll explore everything from yeast health to measurement techniques, ensuring your next brew is a success.
The Unseen Architect: Yeast Health and Fermentation Dynamics
Yeast, often referred to as the brewers' true workhorse, is undeniably the most critical factor in achieving a consistent final gravity. Its health, vitality, and the conditions it operates under dictate the entire fermentation process. Neglecting these aspects is a primary reason for inconsistent final gravity in complex homebrew kits.
Pitching Rate and Viability
Pitching the correct amount of healthy, viable yeast is paramount. Too little yeast, or yeast that's past its prime, leads to a sluggish, incomplete fermentation and a higher-than-expected FG. Too much yeast can also stress the cells, leading to off-flavors and potentially an over-attenuated beer.
For complex kits, especially those with high original gravity (OG), you need significantly more yeast cells. Using a simple packet of dry yeast designed for a standard 1.050 OG pale ale on a 1.100 OG imperial stout is a recipe for disaster. Always consider a yeast starter for liquid yeast or multiple packets for dry yeast in these scenarios.
Fermentation Temperature Control
Temperature is the silent conductor of your fermentation orchestra. Each yeast strain has an optimal temperature range for peak performance. Fluctuations outside this range can shock the yeast, causing it to go dormant or produce undesirable byproducts, leading to a stuck fermentation and an inconsistent final gravity.
I've seen countless batches suffer because a brewer simply placed their fermenter in a spare room without monitoring the ambient temperature. Even minor daily swings can impact yeast activity, especially during the crucial primary fermentation phase. Investing in a fermentation chamber or temperature controller is not a luxury; it's a necessity for consistent brewing outcomes.

Nutrient Availability and Oxygenation
Yeast needs more than just sugar; it requires a balanced diet of nitrogen, phosphates, and trace minerals to thrive. Many complex homebrew kits, especially those relying heavily on adjuncts or specialty malts, might lack sufficient yeast nutrients. Early wort oxygenation is also critical for yeast cell growth and membrane health before fermentation begins.
A lack of proper nutrients or insufficient oxygen can lead to weak yeast, struggling to fully attenuate the wort. This often results in a higher final gravity than anticipated. Adding a yeast nutrient blend and ensuring proper aeration (but not after fermentation starts!) can significantly improve yeast performance and consistency.
"In my experience, treating your yeast right is 90% of the battle for consistent final gravity. Think of them as tiny athletes; they need the right training, nutrition, and environment to perform at their best."
Decoding Your Recipe: Extract vs. All-Grain Complexities
The very composition of your wort, dictated by your homebrew kit's recipe, plays a significant role in determining final gravity. Complex kits often push the boundaries with various malt types, adjuncts, and processing methods, each introducing potential variables that influence fermentability. Understanding these nuances is key to understanding what causes inconsistent final gravity in complex homebrew kits.
Malt Extract Freshness and Quality
If you're using a malt extract-based kit, the quality and freshness of the extract are paramount. Old or improperly stored malt extract can undergo Maillard reactions, leading to darker colors, different flavors, and crucially, a reduction in fermentable sugars. This means the yeast has less to convert, resulting in a higher final gravity.
Always check the 'best by' date on your extract and store it in a cool, dark place. For complex kits, especially those aiming for specific gravity targets, I always recommend fresh, high-quality liquid malt extract (LME) over dried malt extract (DME) if possible, as LME tends to be more consistent when fresh.
Mash Efficiency and Conversion (for all-grain/partial mash kits)
For brewers venturing into partial mash or all-grain complex kits, mash efficiency is a huge factor. The mash is where starches are converted into fermentable sugars by enzymes. An inefficient mash, due to incorrect temperatures, pH, or mash time, will leave behind more unfermentable starches.
This directly translates to a higher final gravity because the yeast simply cannot consume what isn't fermentable. Dialing in your mash temperature for optimal enzyme activity (beta-amylase for fermentability, alpha-amylase for body) is crucial. A small deviation of a few degrees can significantly impact the sugar profile of your wort and, subsequently, your final gravity.
Adjuncts and Unfermentables
Many complex recipes incorporate adjuncts like lactose, oats, wheat, or roasted barley. While lactose is entirely unfermentable by brewer's yeast (contributing sweetness and body), other adjuncts like flaked oats or wheat can introduce starches that, if not properly converted during the mash, will remain in the wort. Specialty malts also contribute varying levels of fermentability.
Understanding the fermentability profile of your entire grain bill and any added sugars (like corn sugar, which is highly fermentable, or maltodextrin, which is unfermentable) is critical. Miscalculating the impact of these ingredients is a common pitfall leading to unexpected final gravity readings.
| Factor | Impact on FG | Control Strategy |
|---|---|---|
| Yeast Health | Directly proportional to cell viability and pitching rate; stressed yeast leads to high FG. | Starters, proper pitching rates, nutrient addition, oxygenation. |
| Fermentation Temperature | Deviations from optimal range cause stuck fermentation or over-attenuation. | Fermentation chamber, temperature controller, stable environment. |
| Malt Extract Freshness | Old/degraded extract reduces fermentable sugars, leading to high FG. | Check 'best by' dates, store properly, use fresh LME. |
| Mash Efficiency | Poor conversion leaves unfermentable starches, resulting in high FG. | Accurate mash temperatures, pH control, proper mash time. |
| Adjuncts/Unfermentables | Introduces non-fermentable sugars or uncoverted starches. | Understand fermentability profile, adjust recipe, ensure proper mash. |
The Silent Saboteurs: Measurement Errors and Equipment Calibrations
Even with perfect brewing practices, your final gravity readings can be misleading if your measurement tools are inaccurate or used incorrectly. This is a subtle yet pervasive cause of perceived inconsistent final gravity in complex homebrew kits. Trusting faulty data can send you down the wrong troubleshooting path.
Hydrometer Calibration and Temperature Correction
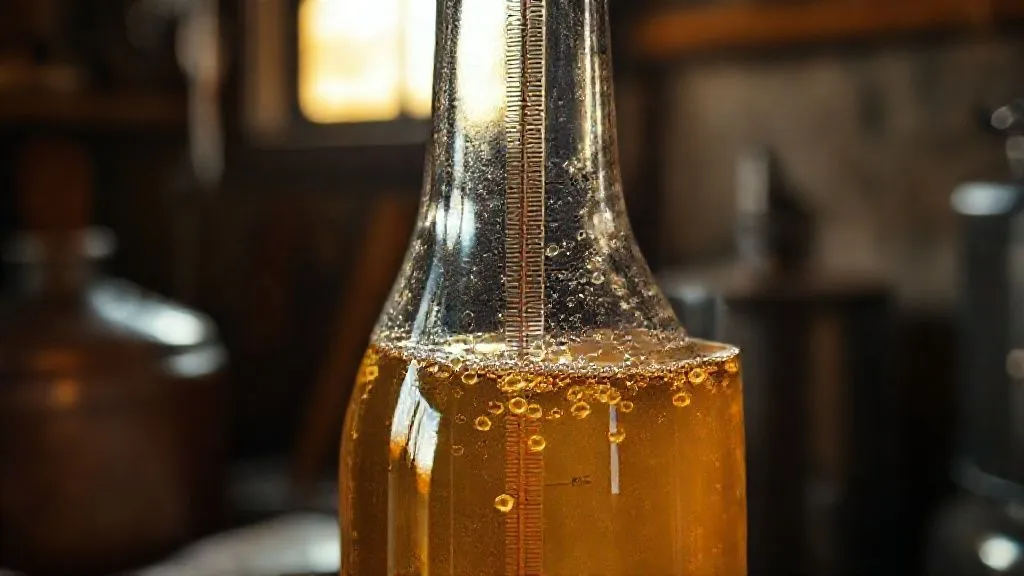
Your hydrometer is your primary tool for measuring specific gravity. However, like any instrument, it needs to be calibrated. A simple test in distilled water at 60°F (15.5°C) should read 1.000. If it doesn't, you have a calibration error that needs to be factored into every reading.
Crucially, hydrometers are calibrated for a specific temperature, usually 60°F (15.5°C). Taking a reading at a different temperature requires a correction. A wort sample that's too warm will give a falsely low reading, while one that's too cold will give a falsely high reading. Always correct your readings to the calibration temperature using a reliable chart or calculator. Brew Your Own offers an excellent guide on hydrometer use and temperature correction.
Refractometer Misreadings and Wort Correction Factor
Refractometers are handy for quick gravity readings, especially for original gravity, as they only require a few drops. However, alcohol interferes with refractometer readings. Once fermentation has begun, a standard refractometer will give an inaccurately high reading. You must use a "wort correction factor" or an online calculator to adjust for the presence of alcohol.
Failing to apply this correction is a common reason brewers believe their final gravity is stuck, when in reality, it has attenuated perfectly. I've heard many stories of panicked brewers pitching more yeast into an already finished beer because they relied solely on an uncorrected refractometer reading. Always use a hydrometer for accurate final gravity readings, or apply the appropriate correction to your refractometer results.
Sample Consistency
Ensure your sample is representative of the entire batch. If you're drawing from the very top of the fermenter, you might get a slightly different reading than from the bottom, especially if there's a krausen layer or trub. Gently agitate the fermenter (if safe to do so) before taking a sample, and always ensure the sample is free of excessive krausen or sediment.
Consistency in your sampling technique, from where you draw the sample to how you prepare it for measurement, will contribute significantly to the reliability of your readings. This meticulous approach helps identify the true causes of inconsistent final gravity in complex homebrew kits.

Beyond the Basics: Advanced Factors Impacting Fermentation
While yeast health, recipe formulation, and accurate measurements cover the majority of FG issues, truly complex homebrew kits can be influenced by more nuanced factors. Over my years, I've delved into these deeper elements, finding they often explain the lingering inconsistencies that defy simpler explanations.
Water Chemistry and pH
Water is the unsung hero (or villain) of brewing. The pH of your mash and wort significantly impacts enzyme activity, yeast health, and ultimately, fermentation efficiency. Most yeast strains prefer a slightly acidic environment (pH 5.0-5.5) for optimal performance. Water that is too alkaline or too acidic can stress yeast and hinder complete attenuation.
For complex kits, especially those with dark malts or high mineral content, balancing your water chemistry is crucial. Adjusting mash pH with lactic acid, phosphoric acid, or brewing salts can make a profound difference in yeast performance and ensure a consistent final gravity. Don't underestimate the power of a water report and targeted adjustments. BrewersFriend offers excellent tools for water chemistry analysis and adjustment.
"Many brewers overlook water chemistry, but it's often the 'missing link' for achieving truly professional-level consistency. A stable, optimal pH environment empowers your yeast to do its best work."
Fermenter Design and Trub Management
The type of fermenter you use and how you manage trub (the sediment of hop material, proteins, and dead yeast cells) can subtly influence final gravity. A fermenter with a large surface area for yeast contact, or one that allows for easy removal of trub, can promote healthier fermentation.
Excessive trub can harbor unfermented sugars or create an environment where yeast struggles to access nutrients. Conical fermenters are excellent for harvesting yeast and removing trub, but even in buckets or carboys, careful racking to a secondary (though often unnecessary) or ensuring a clean primary fermentation can help. Minimizing yeast stress from prolonged contact with trub helps prevent early flocculation and ensures full attenuation.
Post-Fermentation Processes (Dry Hopping, Cold Crashing)
While typically done after primary fermentation, these processes can sometimes impact perceived final gravity or introduce new variables. Dry hopping, especially with large amounts of hops, can sometimes introduce enzymes that further break down complex sugars, leading to a slightly lower FG than expected (known as hop creep).
Cold crashing, while great for clarity, can sometimes cause yeast to drop out prematurely, leading to a slightly higher FG if fermentation wasn't fully complete. It's crucial to ensure your final gravity is stable for at least 3 consecutive days before cold crashing or packaging to avoid bottle bombs or under-attenuated beer. Patience is a virtue in brewing, especially when dealing with the intricacies of complex homebrew kits.
Case Study: Rescuing a High-Gravity Stout from FG Hell
Case Study: How Brewer Ben Conquered His Inconsistent Imperial Stout FG
Ben, a dedicated homebrewer, was attempting his most complex kit yet: a 1.105 OG Imperial Stout. He followed the instructions meticulously, pitched a single packet of liquid yeast, and fermented in his basement. After two weeks, his hydrometer stubbornly read 1.040, far from the predicted 1.020. He was convinced he had a stuck fermentation and was frustrated by another inconsistent final gravity in a complex homebrew kit.
Upon reviewing his process, I identified several culprits. First, his pitching rate was severely under-dosed for such a high gravity beer; a single packet simply couldn't handle the sugar load. Second, his basement temperature, while seemingly stable, was averaging 62°F (16.7°C), on the lower end for his yeast, and likely fluctuated. Lastly, he hadn't used any yeast nutrient.
Here's how we turned it around: Ben created a large, healthy yeast starter (around 1.5 liters) with a fresh, high-alcohol tolerant yeast strain. We gently warmed his fermenter to 68°F (20°C) using a fermentation wrap and controller. He then roused the existing yeast by gently swirling the fermenter and pitched the active starter. We also added a dose of yeast nutrient.
Within 48 hours, fermentation reignited, albeit slowly. Over the next week, the gravity steadily dropped. Two weeks later, his hydrometer consistently read 1.021, perfectly within the target range. This case highlights how a combination of under-pitching, suboptimal temperature, and nutrient deficiency can severely impact attenuation in complex, high-gravity kits, and how targeted interventions can save a batch.
Proactive Strategies for Consistent Final Gravity
The best way to combat inconsistent final gravity in complex homebrew kits is to adopt a proactive, systematic approach. Prevention is always better than cure in brewing. By integrating these strategies into your routine, you'll build confidence and achieve far more predictable outcomes.
Detailed Fermentation Log Keeping
This is arguably the most powerful tool in your brewing arsenal. A detailed log allows you to track every variable: OG, FG, pitching rate, yeast strain, fermentation temperature profile (daily readings!), specific nutrient additions, and any observations. When you encounter an inconsistent final gravity, your log becomes an invaluable diagnostic tool.
Without a log, you're just guessing. With it, you can identify patterns, correlate specific actions with results, and refine your process systematically. I always tell brewers: "If you didn't write it down, it didn't happen." This data-driven approach is critical for mastering complex kits.
Starter Cultures for Complex Beers
For any beer with an original gravity above 1.060, or if using liquid yeast, a yeast starter is non-negotiable. A starter ensures you have an adequate and healthy cell count to tackle the demanding environment of a high-gravity wort. It also "wakes up" the yeast, preparing it for a vigorous fermentation.
- Calculate Your Needs: Use an online pitching rate calculator (e.g., Mr. Malty, Brewer's Friend) to determine the ideal cell count for your specific OG and batch size.
- Prepare a Small Wort: Boil ~100g of DME per liter of water to create a 1.040 OG wort.
- Sanitize: Ensure all equipment (Erlenmeyer flask, stir plate, foil cover) is meticulously sanitized.
- Pitch Yeast: Add your liquid yeast vial/smack pack to the cooled starter wort.
- Aerate & Agitate: Use a stir plate for continuous agitation and aeration, or swirl frequently by hand for 24-48 hours.
- Decant & Pitch: Cold crash the starter, decant the spent wort, and pitch only the concentrated yeast slurry into your main wort.
This simple process dramatically improves yeast health and consistency, directly addressing a major cause of inconsistent final gravity.
Step-by-Step Temperature Ramps
Don't just set a single fermentation temperature and forget it. Employing a temperature ramp can significantly enhance yeast performance and attenuation. Start fermentation at the lower end of your yeast's optimal range to minimize off-flavors, then gradually raise the temperature over several days.
This gentle increase encourages the yeast to finish strong, ensuring full attenuation of all fermentable sugars. For example, fermenting an ale at 65°F (18°C) for the first 3-4 days, then slowly raising it to 68-70°F (20-21°C) for another week, can help scrub diacetyl and ensure a clean, complete fermentation, preventing a high final gravity.
Troubleshooting Common FG Deviations
Even with the best proactive measures, sometimes an inconsistent final gravity still sneaks up on you. Knowing how to diagnose and respond to these deviations is crucial for salvaging a batch and learning for future brews. Don't panic; troubleshoot systematically.
What to do if FG is too High (Stuck Fermentation)
A higher-than-expected final gravity usually indicates a stuck or sluggish fermentation. Before you do anything drastic, ensure your readings are accurate (temperature corrected, hydrometer calibrated).
- Gently Rouse Yeast: Swirl your fermenter gently to resuspend any settled yeast.
- Increase Temperature: Slowly raise the fermentation temperature by 2-5°F (1-3°C) within the yeast's optimal range to encourage activity.
- Pitch More Yeast: If the previous steps don't work, create a small, active starter of a robust, high-alcohol tolerant yeast strain and pitch it.
- Add Yeast Nutrient: A small dose of yeast nutrient might give your struggling yeast the boost it needs.
- Consider Enzymes: In extreme cases of highly unfermentable wort (rare with kits), you might consider adding amylase enzymes, but this should be a last resort as it can lead to very dry beers.
What to do if FG is too Low (Over-attenuation)
A lower-than-expected final gravity is less common but can result in a thin, dry beer. This often points to overactive yeast or an unexpected source of fermentable sugars.
- Review Recipe: Double-check if any highly fermentable adjuncts were accidentally added or if the malt bill was different than intended.
- Check Yeast Strain: Did you use a highly attenuative yeast strain when a less attenuative one was specified? Some saison or champagne yeasts can chew through almost everything.
- Consider Hop Creep: If you dry-hopped heavily, hop creep might be at play, where enzymes from hops break down residual dextrins.
- Water Chemistry: Re-evaluate your water profile; very low pH can sometimes contribute to over-attenuation.
While fixing an already over-attenuated beer is difficult, understanding the cause helps prevent it in the future. It’s about learning what causes inconsistent final gravity in complex homebrew kits and applying that knowledge.
Frequently Asked Questions (FAQ)
Q: Can sanitization issues affect final gravity? A: Absolutely, though indirectly. Poor sanitization can introduce wild yeasts or bacteria, which might be more or less attenuative than your brewer's yeast. This can lead to an unexpected final gravity, often lower if wild yeasts are present, or can produce off-flavors and refermentation after packaging. Meticulous sanitization is always paramount.
Q: How much does yeast strain choice impact FG predictability? A: Enormously. Every yeast strain has a characteristic 'apparent attenuation' range. Some are highly attenuative (e.g., Belgian saisons, some American ale yeasts), while others leave more residual sugar (e.g., English ale yeasts, some German wheat yeasts). For complex homebrew kits, choosing the right yeast for the desired FG, and understanding its specific behavior, is critical for predictability.
Q: Is it ever okay to bottle with an inconsistent FG? A: Never, if the FG is still dropping or significantly higher than expected. Bottling a beer that hasn't reached a stable final gravity is an extreme risk for bottle bombs due to continued fermentation in the sealed bottle. If your FG is consistently high and stable, but not what you wanted, you can still bottle, but understand the beer will be sweeter/heavier. If it's still actively fermenting, wait.
Q: What's the role of primary vs. secondary fermentation on FG? A: The vast majority of attenuation occurs in primary fermentation. Secondary fermentation (racking to another vessel) is primarily for clarity or aging, not for significant further gravity drops. If your FG isn't stable after primary, secondary won't magically fix it. In fact, racking can introduce oxygen, which is detrimental post-fermentation. I generally advise against secondary unless there's a specific reason (e.g., adding fruit, long-term aging).
Q: How do I adjust for different kit types when troubleshooting FG? A: The core principles remain the same, but the emphasis shifts. For extract kits, focus on extract freshness, water quality, and yeast health. For partial mash or all-grain kits, mash efficiency, pH, and grain bill fermentability become equally important. Always read the kit instructions thoroughly and understand the ingredients provided, as this helps you anticipate potential FG challenges unique to that kit.
Key Takeaways and Final Thoughts
Achieving consistent final gravity in complex homebrew kits isn't about luck; it's about understanding the interconnected variables and applying a systematic, informed approach. As we've explored, the culprits are often multifaceted, ranging from the vitality of your yeast to the precision of your measurements and the nuances of your recipe design.
- Yeast is King: Prioritize healthy yeast, correct pitching rates, and stable fermentation temperatures.
- Know Your Wort: Understand the fermentability of your ingredients, whether from extract freshness or mash efficiency.
- Measure Meticulously: Calibrate your tools and correct for temperature to ensure accurate readings.
- Beyond the Basics: Don't overlook water chemistry, fermenter management, and post-fermentation impacts.
- Document Everything: A detailed brew log is your most powerful diagnostic and learning tool.
- Be Proactive: Implement strategies like yeast starters and temperature ramps to prevent issues before they arise.
The journey of homebrewing is one of continuous learning and refinement. Don't let the occasional inconsistent final gravity discourage you. Instead, embrace it as an opportunity to deepen your understanding of the brewing process. By applying the expert insights and actionable steps I've shared, you'll not only master the art of consistent final gravity but also elevate the quality of every beer you brew. Happy brewing!
Recommended Reading
- 5 Steps: Safely Adapting Easy Kids Recipes for Multiple Allergies?
- 5 Critical Steps: Eliminating Cross-Contamination in Pro Sous Vide Kitchens
- 7-Day Meal Prep: My Expert Method to Keep Pre-Cut Veggies Crisp & Fresh
- Stalled Ferment? 7 Ways to Rescue Wild Vegetables Without New Cultures
- Mastering Botulism Prevention in Commercial Low-Acid Canning: 7 Key Steps



0 Comentários: