 By
By 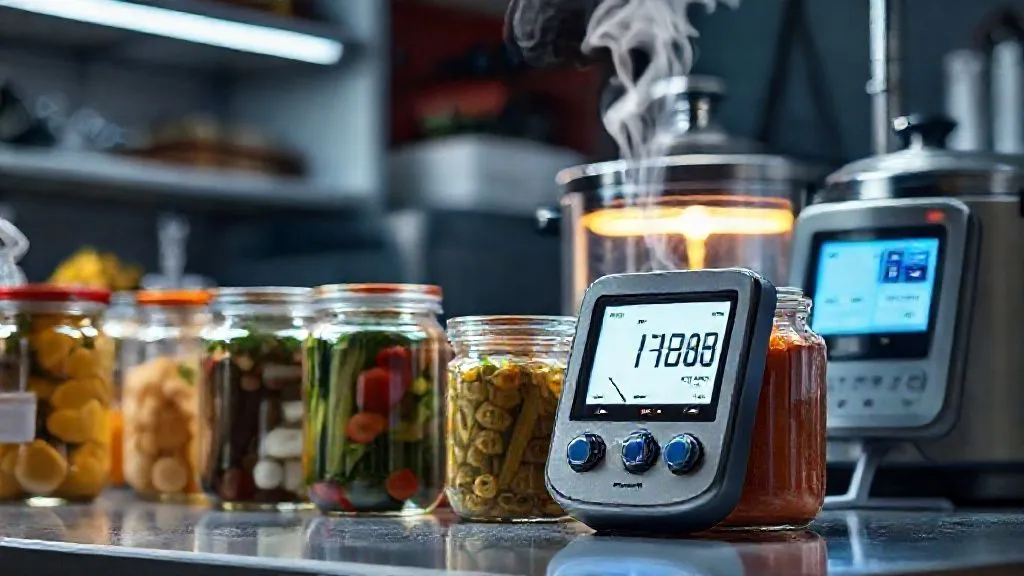
Optimizing pH control to mitigate botulism risk in low-acid foods?
For over two decades in the world of food preservation, I've witnessed firsthand the passion and dedication that goes into home canning. It's a beautiful tradition, a way to connect with our food and extend the bounty of our gardens. Yet, beneath this rewarding practice lies a critical, non-negotiable aspect: food safety. Without a deep understanding of the science, even the most seasoned preservers can unknowingly introduce severe risks.
The specter of botulism, specifically from Clostridium botulinum, is perhaps the most daunting challenge we face, especially when dealing with low-acid foods. This microscopic adversary thrives in anaerobic (oxygen-free), low-acid environments – precisely the conditions often created in a sealed jar of home-canned vegetables or meats. Ignoring the delicate balance of pH can turn a wholesome jar of food into a silent, deadly threat. I've heard too many stories, thankfully mostly cautionary tales, that could have ended tragically due to a misunderstanding of this fundamental principle.
This article isn't just a collection of facts; it's a comprehensive guide born from years of experience, designed to empower you with the knowledge and actionable frameworks needed for optimizing pH control to mitigate botulism risk in low-acid foods. We'll delve into the science, demystify the tools, and provide step-by-step strategies to ensure every jar you preserve is not only delicious but unequivocally safe. Prepare to transform your understanding of food preservation from good intentions to expert-level safety.
Understanding the Botulism Threat in Low-Acid Environments
Before we dive into solutions, it's crucial to truly grasp the nature of the threat. Botulism isn't just food poisoning; it's a rare but potentially fatal paralytic illness caused by toxins produced by the bacterium Clostridium botulinum. This organism is ubiquitous in nature, found in soil, water, and even on the surfaces of many fresh foods. The spores themselves are harmless, but under specific conditions, they germinate, grow, and release a potent neurotoxin.
The Science Behind Clostridium Botulinum
The conditions for botulinum toxin production are very particular: an anaerobic environment (like inside a sealed jar), a temperature range conducive to growth (typically between 40°F and 120°F / 4.4°C and 49°C), sufficient moisture, and critically, a low-acid environment. The bacterium cannot grow in highly acidic conditions. This is why fruits, which are naturally acidic (pH below 4.6), can be safely processed in a boiling water canner, while vegetables and meats, which are low-acid (pH above 4.6), require pressure canning or acidification.
Why pH is the Critical Factor
The pH scale measures acidity and alkalinity, ranging from 0 (most acidic) to 14 (most alkaline), with 7 being neutral. For food preservation, the magic number is 4.6. Foods with a natural pH of 4.6 or below are considered high-acid and inhibit the growth of Clostridium botulinum. Foods with a pH above 4.6 are low-acid and are potential breeding grounds for the bacteria if not properly processed. This is why accurately assessing and, if necessary, adjusting the pH of low-acid foods is not just a recommendation; it's a life-saving imperative. I've often told my students: "If you remember one number from this course, make it 4.6."

Demystifying pH: Tools and Techniques for Accurate Measurement
You can't manage what you don't measure. In the realm of food preservation, this adage is particularly true for pH. Relying on guesswork or outdated recipes is a perilous gamble. Modern home preservers have access to reliable tools that make accurate pH measurement accessible and straightforward. Let's explore the essentials.
Choosing the Right pH Meter for Home Preservation
While pH paper strips exist, their accuracy is often insufficient for the precise measurements required for botulism prevention. For serious preservers, a digital pH meter is the gold standard. There are several types, but for home use, a handheld electrode-based meter is ideal. Look for models that offer: high accuracy (at least +/- 0.02 pH units), automatic temperature compensation (ATC), and easy calibration. Some meters are designed specifically for food, with robust probes that can handle semi-solids. Investing in a good quality pH meter is arguably the most critical step in optimizing pH control to mitigate botulism risk in low-acid foods.
Calibration: Your First Line of Defense Against Inaccuracy
A pH meter is only as good as its calibration. This isn't a 'set it and forget it' tool. Regular calibration is essential to ensure accurate readings. I recommend calibrating your meter before each canning session, or at least weekly if you're canning frequently. You'll need buffer solutions of known pH values (typically pH 4.01 and pH 7.01, and sometimes pH 10.01).
- Prepare Buffer Solutions: Ensure your buffer solutions are fresh and at room temperature. Never reuse buffer solutions as they can become contaminated or degrade.
- Rinse the Electrode: Thoroughly rinse the pH meter electrode with distilled water before and after each use, and between buffer solutions. Gently blot dry with a lint-free wipe.
- Calibrate at pH 7.01: Immerse the electrode in the pH 7.01 buffer solution. Follow your meter's instructions to initiate calibration. The meter will adjust its reading to 7.01.
- Calibrate at pH 4.01: After rinsing, immerse the electrode in the pH 4.01 buffer solution. Calibrate to 4.01. This two-point calibration (sometimes three-point with pH 10.01) provides accuracy across the critical range for food preservation.
- Verify Accuracy: After calibration, test a known solution (like distilled water, which should be near 7.0, or a fresh buffer solution) to confirm accuracy.
- Store Properly: Always store the electrode in its designated storage solution (usually potassium chloride) or a small amount of pH 4.01 buffer, never in distilled water, which can damage the probe.
| Feature | Budget Meter | Mid-Range Meter | Professional Meter |
|---|---|---|---|
| Accuracy | +/- 0.1 pH | +/- 0.05 pH | +/- 0.01 - 0.02 pH |
| Automatic Temp Compensation (ATC) | Limited/Manual | Yes | Yes |
| Probe Type | Glass bulb (standard) | Glass bulb (robust) | Flat/Spear Tip (food specific) |
| Calibration Points | 1-2 points | 2-3 points | 3-5 points |
| Price Range | $20-50 | $50-150 | $150-500+ |
The Acidification Imperative: Safely Lowering pH in Low-Acid Foods
For many low-acid foods like green beans, corn, carrots, and meats, simply pressure canning is sufficient to destroy Clostridium botulinum spores. However, if you wish to process these foods in a boiling water canner (which is only safe for high-acid foods), or if you're developing a new recipe with mixed ingredients, acidification becomes absolutely essential. This is where you actively lower the pH to below 4.6.
Approved Acidulants and Their Application
Not just any acid will do. The USDA and National Center for Home Food Preservation (NCHFP) provide strict guidelines on approved acidulants and their concentrations to ensure safety. The most common and reliable choices include:
- Bottled Lemon Juice: Always use bottled lemon juice, not fresh. Bottled lemon juice has a standardized acidity (typically 5% citric acid), whereas fresh lemon juice can vary wildly in pH. Use 2 tablespoons per pint or 4 tablespoons per quart of food.
- Citric Acid: This is a pure crystalline acid. Use 1/2 teaspoon per pint or 1 teaspoon per quart. It's flavorless, making it ideal for foods where you don't want to alter the taste profile.
- Vinegar (5% Acidity): White distilled vinegar is preferred because its clear color won't affect the food's appearance. Apple cider vinegar can also be used, but ensure it's at least 5% acidity. Use 2 tablespoons per pint or 4 tablespoons per quart. Be aware that vinegar imparts a distinct flavor.
- Ascorbic Acid (Vitamin C): While often used to prevent browning, ascorbic acid is a weak acid and generally not recommended as the sole acidulant for botulism prevention due to its limited pH-lowering capacity.
Expert Insight: "When in doubt about the acidity of a food or a new recipe, err on the side of caution. Always add the recommended amount of an approved acidulant, even if you suspect the food might be borderline acidic. Safety is paramount; flavor can be adjusted later during serving." - Your Industry Specialist
Calculating and Verifying pH Adjustments
Adding a standard amount of acidulant is a good starting point, but for ultimate safety, you must verify the final pH. After adding your chosen acidulant to your food mixture, allow it to sit for at least 15-30 minutes for the acid to fully distribute and react. Then, take a sample and measure its pH with your calibrated meter. Your goal is a consistent reading of pH 4.5 or lower throughout the batch. If it's above 4.5, you'll need to add a bit more acidulant, mix thoroughly, and retest until you reach the safe threshold. This step is critical for optimizing pH control to mitigate botulism risk in low-acid foods, especially for mixed ingredients or new recipes.

Beyond pH: Integrating Pressure Canning for Double-Layered Safety
While pH control is a powerful tool, it's not the only line of defense, nor is it always necessary for naturally low-acid foods. For most low-acid vegetables, meats, and seafood, the primary method of safe preservation remains pressure canning. Pressure canning achieves temperatures far higher than boiling water (240°F-250°F / 116°C-121°C), which is necessary to destroy Clostridium botulinum spores. These spores are incredibly heat-resistant and can survive boiling water temperatures for hours.
The Synergy of Heat and Acidity
When you combine proper acidification (pH 4.5 or below) with appropriate heat processing (even just a boiling water bath), you create a synergistic effect that offers an extremely high level of safety. The acid prevents spore growth, and the heat destroys vegetative cells and other spoilage organisms. For naturally low-acid foods that you *haven't* acidified, pressure canning at the correct pressure and for the specified time is the only safe method. Never attempt to process low-acid foods in a boiling water canner without verified acidification.
Common Mistakes to Avoid in Pressure Canning
- Ignoring Altitude Adjustments: Higher altitudes require increased pressure to reach the same internal temperatures. Always consult USDA guidelines for your specific altitude.
- Improper Venting: Pressure canners must be vented for 10 minutes before applying the weighted gauge or closing the petcock. This purges air, ensuring the canner is filled with pure steam for accurate temperature.
- Opening Too Soon: Allow the canner to cool naturally and depressurize completely before opening. Rapid depressurization can cause liquid loss from jars and seal failures.
- Using Uncalibrated Gauges: If you have a dial gauge canner, have it tested annually. Weighted gauges are generally more reliable as they don't lose calibration.
- Overfilling Jars: Leave appropriate headspace (usually 1 inch) to allow for food expansion and proper sealing.
Case Study: A Small Batch Canning Success Story Through Rigorous pH Control
The Challenge: Preserving Garden Tomatoes Safely
Sarah, an avid gardener, had a bumper crop of heirloom tomatoes. She loved the idea of canning them whole and diced, but she knew that while some tomatoes are acidic, many heirloom varieties can be borderline low-acid, especially if grown in certain soils or conditions. She wanted to avoid the risk of botulism, especially since she planned to share her preserves with family and friends.
The Solution: Precise pH Management
Instead of relying on general assumptions, Sarah decided to implement a rigorous pH control strategy. She invested in a reliable digital pH meter and calibrated it meticulously. For her whole tomatoes, she added 2 tablespoons of bottled lemon juice per pint jar, as per NCHFP recommendations. For her diced tomatoes, which she planned to use in sauces, she took it a step further. After adding the lemon juice, she let the jars sit for 20 minutes, then took a small sample from each jar (before sealing) and measured the pH. She aimed for a consistent pH of 4.3 for an extra margin of safety. If any jar was above 4.5, she added a tiny bit more lemon juice and retested.
The Outcome: Peace of Mind and Delicious Results
By taking these extra steps, Sarah was able to confidently process her tomatoes in a boiling water canner, knowing that she had actively mitigated the botulism risk. Her family raved about the fresh taste of her home-canned tomatoes, and she had the immense satisfaction of knowing she had followed the highest safety standards. This hands-on application of optimizing pH control to mitigate botulism risk in low-acid foods not only yielded delicious results but, more importantly, instilled complete peace of mind.
Advanced Strategies for pH Control: Beyond the Basics
Once you've mastered the fundamentals, there are a few more nuanced aspects of pH control that can further enhance your food preservation safety and success. These strategies are particularly useful for those who venture beyond standard recipes or work with less common ingredients.
Understanding Buffering Capacity of Foods
Different foods have varying 'buffering capacities' – their ability to resist changes in pH when an acid or base is added. Foods high in protein or calcium (like dairy or some meats) tend to have a higher buffering capacity, meaning they require more acidulant to achieve the desired pH drop. Conversely, water-rich, low-protein foods might need less. This is why a 'one-size-fits-all' approach to acidification can sometimes be insufficient. Always measure the final pH, especially with complex recipes.
Considerations for Blended and Mixed Ingredients
When you combine several ingredients, each with its own pH, the final pH of the mixture can be unpredictable. Think of a vegetable soup or a mixed bean salad. In these cases, it's absolutely critical to blend a representative sample of the finished product (after all ingredients and acidulants are added and thoroughly mixed) and measure its pH. This is where your pH meter becomes an indispensable tool. Never assume that because one ingredient is acidic, the whole mixture will be. This proactive approach is key to optimizing pH control to mitigate botulism risk in low-acid foods when experimenting with creative recipes.
Maintaining Vigilance: Ongoing Monitoring and Record Keeping
The work of a safe food preserver isn't over once the jars are sealed. Vigilance, monitoring, and meticulous record-keeping are the hallmarks of an expert. These practices not only reinforce safety but also help you refine your techniques over time.
Batch Testing and Documentation
For every batch of acidified low-acid food, I strongly recommend keeping a simple log. Note the date, the recipe used, the type and amount of acidulant added, and most importantly, the *final pH reading* of the mixture before canning. This documentation serves as a critical reference. If you ever have a question about a particular jar months later, your log provides the answers. It also helps you identify if a specific ingredient or preparation method consistently leads to a higher or lower pH, allowing for adjustments in future batches.
When in Doubt, Throw it Out: The Golden Rule
This is perhaps the most important piece of advice I can offer. If a jar doesn't seal properly, if you suspect the pH might not have been low enough, if the food looks or smells off, or if there's any uncertainty at all about the safety of a preserved product, do not taste it. Do not risk it. Discard it immediately. Botulinum toxin is odorless, colorless, and tasteless. There are no visual cues to tell you it's present. The potential consequences far outweigh the cost of discarding a single jar. Your health, and the health of those you feed, is priceless. This unwavering commitment to safety epitomizes the goal of optimizing pH control to mitigate botulism risk in low-acid foods.
Common Pitfalls and How to Avoid Them in pH-Controlled Canning
Even with the best intentions, mistakes can happen. Recognizing common pitfalls is half the battle in preventing them. Let's review some frequent errors I've observed and how to sidestep them.
- Using Fresh Lemon Juice: As mentioned, fresh lemon juice's acidity varies. Always use bottled lemon juice with standardized acidity for reliable pH reduction.
- Inadequate Mixing: Simply pouring acidulant into a jar isn't enough. It must be thoroughly mixed throughout the food to ensure even pH distribution.
- Not Calibrating the pH Meter: A pH meter that isn't regularly calibrated is unreliable and can give dangerously inaccurate readings. Treat calibration as a non-negotiable step.
- Ignoring Altitude: Altitude affects the boiling point of water and thus the effectiveness of pressure canning. Always adjust processing times and pressures according to USDA guidelines for your elevation.
- Under-processing: Whether it's a boiling water bath (for acidified foods) or a pressure canner (for low-acid foods), adhering strictly to recommended processing times and methods is crucial. Never shorten processing times.
- Using Unverified Recipes: Rely only on tested, approved recipes from reputable sources like the NCHFP or USDA. Do not modify ingredients or processing times in untested recipes without expert guidance and pH verification.
Key Insight: "The pursuit of novelty in canning recipes is admirable, but never at the expense of safety. If you're deviating from a tested recipe with low-acid ingredients, your pH meter becomes your co-pilot, guiding every critical decision. Trust the science, not just your intuition."
| Problem | Cause | Solution |
|---|---|---|
| pH meter inconsistent readings | Poor calibration, old buffer solutions, dirty probe, probe drying out | Calibrate before each use, use fresh buffers, clean probe with distilled water, store probe in solution |
| Food tastes too acidic after adding lemon juice/vinegar | Over-acidification, or preference for milder flavor | Use citric acid (flavorless) or adjust acidulant quantity to minimum safe level (verify with pH meter) |
| Jars not sealing properly | Improper headspace, dirty rim, faulty lids, over-tightening bands, rapid depressurization (pressure canner) | Follow headspace rules, clean rims, use new lids, tighten 'fingertip tight', allow natural cooling |
| Food looks cloudy or has unusual growth | Spoilage due to inadequate processing, improper pH, or seal failure | Discard immediately without tasting; review canning process and pH control for future batches |
Frequently Asked Questions (FAQ)
Q: Can I use a pH test strip instead of a digital pH meter for canning? A: While pH test strips are convenient, their accuracy is generally not sufficient for the critical precision required in low-acid food preservation. For mitigating botulism risk, you need to ensure the pH is definitively below 4.6, and ideally 4.5 or lower. Digital pH meters offer much greater accuracy (typically +/- 0.01 to 0.05 pH units) compared to strips (which might be +/- 0.5 pH units). I always recommend investing in a good quality digital pH meter and calibrating it regularly for reliable results.
Q: What if I don't have bottled lemon juice or citric acid? Can I just use more vinegar? A: While vinegar (5% acidity) is an approved acidulant, it imparts a strong flavor that might not be desirable in all foods. Bottled lemon juice and citric acid are preferred for their neutral flavor profiles and standardized acidity. If you must use vinegar, ensure it is 5% acidity and use the recommended amount (2 tbsp per pint, 4 tbsp per quart). However, for best results and minimal flavor alteration, I strongly advise having bottled lemon juice or citric acid on hand, as these are the most versatile and reliable options for optimizing pH control to mitigate botulism risk in low-acid foods.
Q: Is it safe to mix low-acid and high-acid foods in a single jar without adding extra acid? A: No, absolutely not without verifying the final pH. The pH of a mixed product is not simply an average of its components. A small amount of low-acid food can raise the overall pH of a mixture above the safe threshold of 4.6, even if it contains a significant amount of high-acid ingredients. You must treat any mixture containing low-acid ingredients as a low-acid food and either pressure can it or acidify it and then verify the final pH with a calibrated meter before processing in a boiling water bath.
Q: How long can Clostridium botulinum spores survive? A: Clostridium botulinum spores are incredibly resilient. They can survive boiling water temperatures for several hours. This is precisely why pressure canning is essential for low-acid foods, as it reaches temperatures (240-250°F / 116-121°C) sufficient to destroy these heat-resistant spores. In a low-acid, anaerobic environment at room temperature, these spores can remain viable indefinitely and will germinate and produce toxin if conditions become favorable. This highlights why proper pH control or pressure canning is not just about killing existing bacteria, but preventing spore germination.
Q: Can I re-process jars if I'm unsure about their pH or processing? A: Re-processing is generally not recommended as a solution for uncertain safety. If you discover an issue (e.g., pH was too high, or processing time was too short) shortly after the initial canning (within 24 hours), you *might* be able to re-process if the food has been safely refrigerated. However, this often leads to overcooked food and diminished quality. If there's any significant doubt about the safety of a jar, especially if it's been stored at room temperature for an extended period, the safest course of action is to discard the food. Your health is not worth the risk.
Key Takeaways and Final Thoughts
Navigating the complexities of food preservation, especially when it comes to low-acid foods, requires both passion and precision. As an industry specialist, I've seen how a deep understanding of pH control transforms hesitant beginners into confident, safe preservers. This journey from uncertainty to expertise is not just about following rules; it's about understanding the 'why' behind every step, particularly when it comes to optimizing pH control to mitigate botulism risk in low-acid foods.
- Master the pH Meter: Invest in a reliable digital pH meter and calibrate it religiously. It's your most important safety tool.
- Acidify with Authority: Use only approved acidulants like bottled lemon juice, citric acid, or 5% vinegar, and always verify the final pH of your food.
- Embrace Pressure Canning: For non-acidified low-acid foods, pressure canning is non-negotiable for destroying botulinum spores.
- Document Everything: Keep records of your pH readings and canning processes for every batch.
- Prioritize Safety Over Everything: When in doubt, discard. Your health and the health of your loved ones depend on it.
Remember, every jar you safely preserve is a testament to your skill, knowledge, and dedication to food safety. By rigorously applying the principles of pH control, you're not just canning food; you're preserving health, tradition, and peace of mind. Continue to learn, continue to question, and most importantly, continue to preserve safely. Happy canning!
Recommended Reading
- Preserve Flavor: 7 Expert Steps to Batch Complex Cocktails Flawlessly
- Mastering Shrimp Scampi: 7 Pro Secrets for Perfect, Flavorful Results
- 5 Simple Steps: Slash Post-Work Dinner Cleanup for Professionals?
- 7 Proven Strategies: Master High-Volume Garden Fermentation & Stop Spoilage
- Achieve Consistent Doneness: High-Volume Gas Grilling Secrets Revealed
0 Comentários: